abstract: These files are not specific to rhocoin. They are a collection of notes on setting up operating systems and tools. Every time I mess around and encounter some grief, I add to this pile of notes, which has become inconveniently long and needs to be broken up.
For a gpt partition table, sixteen MiB fat32 partition with boot and efi flags set, one gigabyte linux swap, and the rest your ext4 root file system.
With an efi-gpt partition table, efi handles multiboot, so if you have windows, going to need a bigger boot-efi partition. (grub takes a bit over four MiB)
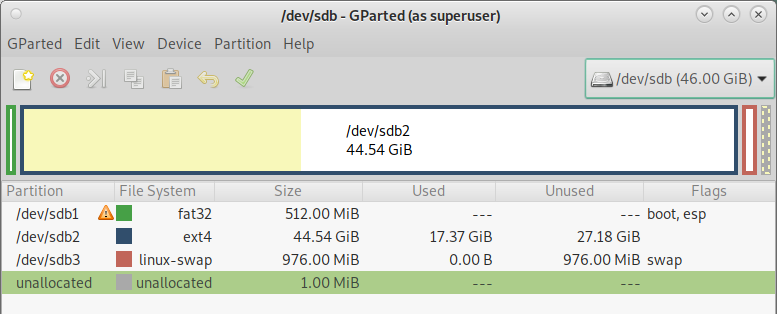
For an ms-dos (non efi) partition table, fivehundred and twelve MIB ext4 partition with the boot flag set, (linux uses 220 MiB) one gigabyte linux swap, and the rest your ext4 root file system.
In `gparted’ an msdos partition table for a linux system should look something like this
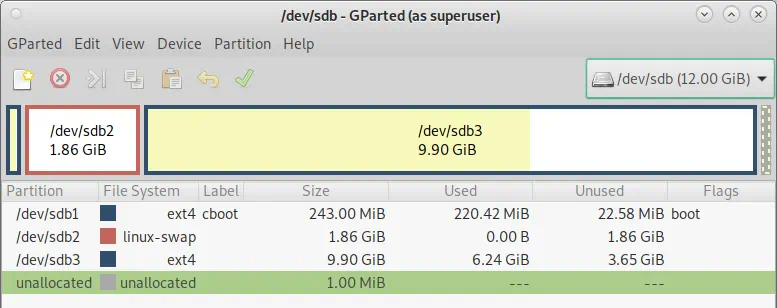
And a gpt partition table for a linux system should look something like this
Linux oom killer is designed for servers and the C compilation toolchain. Locks desktops
Any linux desktop needs early oom.
apt update
apt ugrade -qy
apt install earlyoom libnotify-bin
nano  /etc/default/earlyoom
# Examples:
# Print memory report every minute instead of every hour
# EARLYOOM_ARGS="-r 60"
# Available minimum memory 5%
# EARLYOOM_ARGS="-m 5"
# Available minimum memory 15% and free minimum swap 5%
# EARLYOOM_ARGS="-m 15 -s 5"
# Avoid killing processes whose name matches this regexp
# EARLYOOM_ARGS="--avoid '(^|/)(init|X|sshd|firefox)$'"
# See more at `earlyoom -h'
notify_command='notify-send "Early OOM" "Process {process_name} was killed"'
# Prefer killing browsers, avoid Codium and development tools
EARLYOOM_ARGS="-m 5 -M 10 -s 5 -S 10 -r 60 --prefer '(^|/)(firefox|chrome|chromium|brave|opera|vivaldi|microsoft-edge|waterfox|librewolf|epiphany|konqueror|falkon|qutebrowser|nyxt|surf|midori|seamonkey|palemoon|basilisk)$' --avoid '(^|/)(init|systemd|Xorg|sshd|dbus-daemon|gnome-shell|kwin_x11|plasmashell|codium|code-oss|vscodium|gcc|g\\+\\+|clang|clang\\+\\+|make|cmake|ninja|meson|autoconf|automake|ld|as|objdump|gdb|rustc|cargo|go|javac|java|node|npm|python|ruby|php)$' --avoid-oom-score-adj -1000"If you have unreasonably large swap storage, you can still get the system stalling unreasonably while earlyoom fails to kick in.
# Reduce system's tendency to swap
echo 'vm.swappiness=10' | sudo tee -a /etc/sysctl.conf

# Prefer dropping caches over swapping
echo 'vm.vfs_cache_pressure=50' | sudo tee -a /etc/sysctl.conf
For vms that are used a lot, consider providing ample swap storage on virtual disk that loses all its contents every time the vm is shut down and restarted.
Install librewolf, though you might need firefox for websites than insist on full spy capability.
apt update && apt install extrepo -y
extrepo enable librewolf
apt update && apt install chromium librewolf -yThe Chromium browser is the anti privacy browser, reporting everything you do to one of the world’s greatest llms, and should only be used in a firewalled and wireguarded environment dedicated to a single identity with a single set of activities.
To build a cross platform application, you need to build in a cross platform environment.
If you face grief launching an installer for your virtual box device make sure the virtual network is bridged mode and get into the live cd command line.
sudo -i
apt-get update
apt-get install debian-installer-launcher
debian-installer-launcher --textHaving a whole lot of different versions of different machines, with a whole lot of snapshots, can suck up a remarkable amount of disk space mighty fast. Even if your virtual disk is quite small, your snapshots wind up eating a huge amount of space, so you really need some capacious disk drives. And you are not going to be able to back up all this enormous stuff, so you have to document how to recreate it.
Each snapshot that you intend to keep around long term needs to correspond to a documented path from install to that snapshot.
When creating a Virtual Box machine, make sure to set the network adapter to paravirtualization, set preferences in the file menu, the virtual hard disk, and the snapshot directory to the desired location. Virtual hard disk location selection is done when creating it, snapshot directory is done in settings/general/advanced (which also allow you to do clipboard sharing).
apt-get -qy update && apt-get -qy upgrade
# Fetches the list of available updates and
 # Strictly upgrades the current packages
To install guest additions, thus allow full communication between host and virtual machine, update Ubuntu, then while Ubuntu is running, simulate placing the guest additions CD in the simulated optical drive. Then Ubuntu will correctly activate and run the guest additions install.
Installing guest additions frequently runs into trouble. Debian especially tends to have security in place to stop random people from sticking in CDs that get root access to the OS to run code to amend the OS in ways the developers did not anticipate.
Devuan is the same as Debian, except not woke, uses sysinit instead of systemd. I wanted to use it for those reasons, but:
The Devuan netinstall does not boot correctly on an EFT UEFI system, nor can it format it or partition it. Nor can it recognize an an existing format that has been setup for it in advance.
Some Devuan installers recognize that, but then throw you into the deep end to install the bootloader yourself.
Devuan can only be installed on EFT UEFI system semi manually, and everyone who tries it gives up.
The grub package for UEFI is apt install grub-efi-amd64
which no Devuan installer plays nice with. Even the ones
that are UEFI aware are not aware of how to install it.
One can manage to get Devuan booting on EFI, but it is not worth it.
To do in on oracle vm, copy a debian vm (so that the boot variables are setup to boot efi/debian/grub, because adding a boot option in the bios boot manager does not work in an oracle vm)
Then in a live debian cd with the source and target virtual disks attached, the source being non uefi devuan machine
Change the uuids of the newly created target system
copy the files from the working mbr install of devuan.
(using rsync -a as root so that you do not screw up the user ownership
of the files)
mount -m /dev/sdb2 /mnt/source
mount -m /dev/sdc2 /mnt/destination
mkdir -p /mnt/destination/boot/efi
mount /dev/sdc1 /mnt/destination/boot/efi
rsync -a /mnt/source/* /mnt/destination
# check if /mnt/destination/boot/grub/x86_64-efi or similar thing with efi label exists
# if it does not
cp /boot/grub/x86_64-efi /mnt/destination/boot/grub
for i in /sys /proc /dev /dev/pts /dev/shm; do sudo mount -B $i /mnt/destination$i; done
sudo mount --bind /dev /mnt/destination/dev
sudo mount --bind /dev/pts /mnt/destination/dev/pts
sudo mount --bind /proc /mnt/destination/proc
sudo mount --bind /sys /mnt/destination/sys
chroot /mnt/destination/
# make fstab look like the UEFI fstab of a regular debian UEFI install
# edit the UUIDs in fstab, and provide the needed mount points
# Reinstall GRUB within the chroot environment:
grub-install --target=x86_64-efi --efi-directory=/boot/efi --bootloader-id=debian
update-grub
# fails because of missing grub efi directory tree
# copy the missing grub directory that you mucked up the first time
# over from your live cd
# and do another grub install.
Don’t do any of that. It is too tiresome and the fact that you have to do it should tell you that devuan cannot keep up. If I can install on a UEFI system why cannot someone write an installer that can do what I did?
Login as root and manually type in:
apt update
apt full-upgrade
apt install sudo avahi-daemon
visudo # turn off password for sudo
# give the user sudo
usermod -a -G sudo «username»
if visudo is configured for the wrong editor, you should have set .bashrc to have the line
export EDITOR=/usr/bin/nano in ~/bashrc
Then you can login through ssh, sudo to root, and fix ssh and all that using cut and paste.
And then, once you can login through public keys, install the desktop if desired
using apt -y install task-mate-desktop
This installs x-windows and all that, all that is needed to bring up mate at boot.
Whereas apt install mate-desktop-environment only installs the desktop, whichall that
xrdp needs, since xrdp provides an x windows server and all that.
install fails when installing Debian 12 UEFI
Edit the Grub boot entry when booting off the install ISO.
1. Highlight the “Install” option
2. Press “e” to edit the Grub entry
3. Add fb=false before the --- parameter
Should read something like linux /install.amd/vmlinuz vga=788 fb=false --- quiet
4. Press F10 or Ctrl+X to boot
If it is a server and you are using nfs, don’t need guest additions and therefore do not need module-module assistant, and may not need the build stuff.
sudo -i
apt-get -qy update
apt-get -qy full-upgrade
apt-get -qy install dnsutils curl sudo dialog rsync zstd avahi-daemon nfs-common
To access disks on the real machine, create the empty directory «/mytarget» directory and add the line
«my-nfs-server»:/«my-nfs-subdirectory» «/mytarget» nfs4 defaults 0 0to /etc/fstab
to test that it works without rebooting: mount «/mytarget» as root
If you are running it through your local machine, you want to bring up the gui and possibly the disk access through guest additions
To install guest additions on Debian:
sudo -i
apt-get -qy update && apt-get -qy install build-essential module-assistant
apt-get -qy install git dnsutils curl sudo dialog rsync zstd avahi-daemon nfs-common
apt-get -qy full-upgrade
m-a -qi prepare
apt install linux-headers-$(uname -r)
apt autoremove -qy
mount  /media/cdrom0
cd /media/cdrom0 && sh ./VBoxLinuxAdditions.run
usermod -a -G vboxsf «username»
You will need to do another m-a prepare and to reinstall it after a
apt-get -qy dist-upgrade. Sometimes you need to do this after a mere
upgrade to Debian or to Guest Additions. Every now and then, guest
additions gets mysteriously broken on Debian, due to automatic operating
system updates in the background, the system will not shut
down correctly, and guest additions has to be reinstalled with a
shutdown -r. Or copy and paste mysteriously stops working.
On windows using Oracle vm
/c/Program\ Files/oracle/VirtualBox/VBoxManage setextradata «vboxname» GUI/LastGuestSizeHint 2176,1360
To switch between windowed mode and fullscreen, host+F
When you install guest additions or wireguard, you are recompiling and need the appropriate kernel headers. Which may not be available if you do not have the latest kernel. Which you frequently do not.
apt-get -qy full-upgrade normally makes this problem go away.
a normal upgrade may leave your kernel out of dae.
To get the latest kernel headers manually
apt install linux-headers-$(uname -r)Suppose it is not found. Probably because your kernel is out of date.
Suppose you want to manually update it, perhaps because it stubbornly remains strangely out of date
To find what is the latest kernel apt-cache search linux-image,
and then install the selected image with apt install «linux-image-6.1.0-25-amd64»
After that, full upgrade, because updating the kernel is likely to mysteriously start working again.
To set automatic login on lightdm-mate
nano /etc/lightdm/lightdm.confIn the [Seat:*] section of the configuration file (there is another section of this configuration file where these changes have no apparent effect) edit
#autologin-guest=false
#autologin-user=user
#autologin-user-timeout=0
to
autologin-guest=false
autologin-user=«username»
autologin-user-timeout=0nano /etc/default/grubThe full configuration built by update-grub is built from the file /etc/default/grub, the file /etc/fstab, and the files in /etc/grub.d/.
Among the generated files, the key file is menu.cfg, which will contain a boot entry for any additional disk containing a linux kernel that you have attached to the system. You might then be able to boot into that other linux, and recreate its configuration files within it.
To set things to autostart on gui login under Mate and KDE Plasma create
the directory ~/.config/autostart and copy the appropriate *.desktop
files into it from /usr/share/applications or
~/.local/share/applications.
On Debian lightdm mate go to system/ control center/ Look and Feel/ Screensaver and turn off the screensaver screen lock
Go to go to system / control center/ Hardware/ Power Management and turn off the computer and screen sleep.
In the shared directory, I have a copy of /etc and ~.ssh ready to roll, so I just go into the shared directory copy them over, chmod .ssh and reboot.
Alternatively manually set them then
chmod 700 ~/.ssh && chmod 600 ~/.ssh/*You can manually edit the hosts file, or the .ssh/config file, which is a pain if you have a lot of machines, or fix your router to hand out
names, which cheap routers do not do and every router is different.
Or, if it is networked in virtual box bridged mode,
sudo apt-get update && sudo apt-get upgrade
sudo apt-get install avahi-daemon
Which daemon will multicast the name and IP address to every machine on the network so that you can access it as «name».local
check the hostname and dns domain name with
hostname && domainname -s && hostnamectl statusAnd if need be, set them with
fn=«example.com»
domainname -b $fn
hostnamectl set-hostname $fn
Your /etc/hosts file should contain
127.0.0.1       localhost
127.0.0.1       «example.com»
# The following lines are desirable for IPv6 capable hosts
::1     ip6-localhost ip6-loopback
fe00::0 ip6-localnet
ff00::0 ip6-mcastprefix
ff02::1 ip6-allnodes
ff02::2 ip6-allrouters
ff02::3 ip6-allhosts
To change the host ssh key, so that different hosts have different hostnames after I copied everything to a new instance:
cd /etc/ssh
cat sshd* |grep HostKey
#Make sure that `/etc/ssh/sshd_config` has the line
#     HostKey /etc/ssh/ssh_host_ed25519_key
rm -v ssh_host*
ssh-keygen -t ed25519 -f  /etc/ssh/ssh_host_ed25519_key
Note that visual studio remote compile requires an ecdsa-sha2-nistp256 key on the host machine that it is remote compiling for. If it is nist, it is
backdoored
To change the snake oil certificate created and used by xrdp:
make-ssl-cert generate-default-snakeoil --force-overwriteIf the host has a domain name, the default in /etc/bash.bashrc will not display it in full at the prompt, which can lead to you being confused about which host on the internet you are commanding.
nano /etc/bash.bashrcChange the lower case h in PS1='${debian_chroot:+($debian_chroot)}\u@\h:\w\$ ' to an upper case H
PS1='${debian_chroot:+($debian_chroot)}\u@\H:\w\$ 'I also like the bash aliases:
alias ll="ls --color=auto -hal --time-style=iso"
mkcd() { mkdir -p "$1" && cd "$1"; }
Setting them in /etc/bash.bashrc sets them for all users, including root. But the default ~/.bashrc is apt to override the change of H for h in PS1
The line for in fstab for optical disks needs to given the options udf,iso9660 ro,users,auto,nofail so that it automounts, and any user can eject it.
Confusingly, nofail means that it is allowed to fail, which of course it will
if there is nothing in the optical drive. If you have auto but not nofail the system
will not boot into multi-user let along gui unless there is something in the drive.
You get dropped into single user root logon (where you will see an error message
regarding the offending drive and can edit the offending fstab).
user,noauto means that the user has to mount it, and only the user that
mounted it can unmount it. user,auto is likely to result in root mounting it,
and if root mounted it, as it probably did, you have a problem. Which
problem is fixed by saying users instead of user
The same as for Debian, except that the desktop addition lacks openssh-server, it already has avahi-daemon to make the name available, and the install program will setup auto login for you.
sudo apt install openssh-server.Then ssh in
sudo -i
apt-get -qy update && apt-get -qy install build-essential dkms
apt-get -qy install git dnsutils curl sudo dialog rsync zstd
apt-get -qy full-upgrade
apt autoremove -qy
Then you click on the autorun.sh in the cdrom through the gui.
usermod -a -G vboxsf «username»OpenWrt is a router, and needs a network to route. So you use it to route a virtual box internal network.
Ignore the instructions on the OpenWrt website for setting up in Virtual Box. Those instructions are wrong and do not work. Kind of obvious that they are not going to work, since they do not provide for connecting to an internal network that would need its own router. They suffer from a basic lack of direction, purpose, and intent.
Download the appropriate gzipped image file, expand it to an image file, and convert to a vdi file.
You need an x86 64 bit version of OpenWrt. There are four versions of them, squashed and not squashed, efi and not efi. Not efi is more likely to work and not squashed is more likely to work, but only squashed supports automatic updates of the kernel.
In git bash terminal
gzip -d openwrt-*.img.gz
/c/"Program Files"/Oracle/VirtualBox/VBoxManage convertfromraw --format VDI openwrt-22.03.3-x86-64-generic-ext4-combined.img openwrt-generic-ext4-combined.vdi
Add the vdi to oracle media using the oracle media manager.
The resulting vdi file may have things wrong with it that would prevent it from booting, but viewing it in gparted will normalize it.
Create a virtual computer, name openwrt, type linux, version Linux 2.6, 3.x, 4.x, 5.x (64 bit) The first network adaptor in it should be internal, the second one should be NAT or bridged/
Boot up openwrt headless, and any virtual machine on the internal network should just work. From any virtual machine on the internal network, configure the router at http://192.168.1.1
The first virtual disk attached to a virtual machine is /dev/sda, the second
is /dev/sdb, and so on and so forth.
This does not necessarily correspond to order in which virtual drives have been attached to the virtual machine
Be warned that the debian setup, when it encounters multiple partitions that have the same UUID (because one system was cloned from the other) is apt to make seemingly random decisions as to which partitions to mount to what. So, you should boot from a live cd-rom, and attach the system to be manipulated to that.
This also protects you from accidentally manipulating the wrong system.
The resulting repaired system may nonetheless take a strangely long time to boot, because it is trying to resume a suspended linux, which may not be supported on your device.
boot-repair and update-initramfs make a wild assed guess that if it sees
what looks like a swap partition, it is probably on a laptop that supports
suspend/resume. If this guess is wrong, you are in trouble.
If it is not supported this leads to a strangely long boot delay while grub waits for the resume data that was stored to the swap file:
#to fix long waits to resume a nonexistent suspend
sudo -i
nano /etc/initramfs-tools/conf.d/resumeRESUME=noneupdate-initramfs -u
shutdown -r nowIf you have a separate boot partition in an efisystem then the grub.cfg in /boot/efi/EFI/debian (not to be confused with all the other grub.cfgs)
should look like
search.fs_uuid «8943ba15-8939-4bca-ae3d-92534cc937c3» boot hd0,gpt«4»
set prefix=($boot)'/grub'
configfile $prefix/grub.cfg
Where the «funny brackets», as always, indicate mutas mutandis.
Should you dig all the way down to the efi boot menu, which boots grub, which then boots the real grub, the device identifier used corresponds to the PARTUUID in
lsblk -o name,type,size,fstype,mountpoint,UUID,PARTUUID while linux uses the UUID.
This will display something like
NAME   TYPE  SIZE FSTYPE MOUNTPOINT UUID                                 PARTUUID
sda    disk   20G
├─sda1 part  512M vfat   /boot/efi  2444-76B3                            797edd50-0c57-45f4-8220-dc485aeeab17
└─sda2 part 18.5G ext4   /          1b05149d-ca76-4ddf-ab14-6af124c513c2 ca01668d-f5ff-4e69-9b5d-536fc136a967
sdb    disk    5G
└─sdb1 part    5G swap   [SWAP]     f3f1f1fb-d972-4902-814c-a407f23e6d42 df5f1bd6-01
sdc    disk   17G
└─sdc1 part   17G swap              b25ff239-9e79-4db0-991c-2c5a3e49c172 adc1538f-a06e-4954-b52c-7453dc547898
sr0    rom  1024M
If you attach two virtual disks representing two different linux systems,with the same UUIDs to the same sata controller while powered down, big surprise is likely on powering up. Attaching one of them to virtio will evade this problem.
If you amend file system UUID’s referenced in fstab and boot, have to amend /etc/fstab and /boot/efi/EFI/debian/grub.cfg, then rerun update-grub.
But a better solution is to change all the UUIDs, since every piece of software expects them to be unique, and edit /etc/fstab accordingly. Which will probably stop grub from booting your system, because in grub.cfg it is searching for the /boot or / by UUID.
However, sometimes one can add one additional virtual disk to a sata controller after the system has powered up, which will produce no surprises, for the disk will be attached but not mounted.
So cheerfully attaching one linux disk to another linux system so that you can manipulate one system with the other may well have surprising, unexpected, and highly undesirable results.
What decisions it has in fact made are revealed by lsblk
If one wants to add a several attached disks without surprises, then while the virtual machines is powered down, attach the virtio-scsis controller, and a bunch of virtual hard disks to it. The machine will then boot up with only the sata disk mounted, as one would expect, but the disks attached to the virtio controller will get attached as the ids /dev/sda, /dev/sdb, /dev/sdc/, etc, while the sata disk gets mounted, but surprisingly gets the last id, rather than the first.
After one does what is needful, power down and detach the hard disks, for if a hard disk is attached to multiple systems, unpleasant suprises are likely to ensue.
So when you attach a foreign linux disk by sata to another linux system, attach after it has booted, and detach before you shutdown, to ensure predictable and expected behavior.
This however only seems to work with efi sata drives, so one can only attach one additional disk after it has booted.
Dynamic virtual disks in virtual box can be resized, and copied to a different (larger size)
Confusingly, the documentation and the UI does not distinguish between dynamic and fixed sized virtual disks - so the UI to change a fixed sized disks size, or to copy it to a disk of different size is there, but has absolutely no effect.
Having changed the virtual disk size in the host system, you then want to
change the partition sizes using gparted, which requires the virtual disk to
be attached, but not mounted, to another guest virtual machine in which
you will run gparted.
Over time, dynamic virtual disks occupy more and more physical storage, because more and more sectors become non zero, even though unused.
You attach the virtual disk that you want to shrink to another guest OS as
/dev/sdb, which is attached but not mounted, and, in the other guest OS
zerofree /dev/sdb1 which will zero the free space on partition 1. (And
similarly for any other linux file system partitions)
You run zerofree, like gparted, in another in a guest OS, that is mounted
on /dev/sda while the disk whose partitions you are zeroing is attached,
but not mounted, as /dev/sdb1.
You can then shrink it in the host OS with
VBoxManage modifyhd -compact thediskfile.vdior make a copy that will be smaller than the original.
To resize a fixed sized disk you have to make a dynamic copy, then run gparted (on the other guest OS, you don’t want to muck with a mounted file system using gparted, it is dangerous and broken) to shrink the partitions if you intend to shrink the virtual disk, resize the dynamic copy in the host OS, then, if you expanded the virtual disk run gparted to expand the partitions.
To modify the size of a guest operating system virtual disk, you need that OS not running, and two other operating systems, the host system and a second guest operating system. You attach, but not mount, the disk to a second guest operating system so that you can run zerofree and gparted in that guest OS.
And now that you have a dynamic disk that is a different size, you can create a fixed size copy of it using virtual media manager in the host system. This, however, is an impractically slow and inefficient process for any large disk. For a one terabyte disk, takes a couple of days, a day or so to initialize the new virtual disk, during which the progress meter shows zero progress, and another day or so to do actually do the copy, during which the progress meter very slowly increases.
Cloning a fixed sized disk is quite fast, and a quite reasonable way of backing stuff up.
To list block devices lsblk -o name,type,size,fsuse%,fstype,fsver,mountpoint,UUID.
To mount an attached disk, create an empty directory, normally under
mnt, and mount /dev/sdb3 /mnt/newvm
For example:
root@example.com:~#lsblk -o name,type,size,fsuse%,fstype,fsver,mountpoint,UUID
NAME   TYPE SIZE UUID                                 FSTYPE MOUNTPOINT
sda    disk 20G
├─sda1 part 33M  E470-C4BA                            vfat   /boot/efi
├─sda2 part  3G  764b1b37-c66f-4552-b2b6-0d48196198d7 swap   [SWAP]
└─sda3 part 17G  efd3621c-63a4-4728-b7dd-747527f107c0 ext4   /
sdb    disk 20G
├─sdb1 part 33M  E470-C4BA                            vfat
├─sdb2 part  3G  764b1b37-c66f-4552-b2b6-0d48196198d7 swap
└─sdb3 part1 7G  efd3621c-63a4-4728-b7dd-747527f107c0 ext4
sr0    rom  1024M
root@example.com:~# mkdir -p /mnt/sdb2
root@example.com:~# mount /dev/sdb2 /mnt/sdb2
root@example.com:~# ls -hal /mnt/sdb2
drwxr-xr-x  20 root root 4.0K Dec 12 06:55 .
drwxr-xr-x   5 root root 4.0K Dec 20 16:02 ..
drwxr-xr-x   4 root root 4.0K Dec 12 06:27 dev
drwxr-xr-x 119 root root 4.0K Dec 20 12:58 etc
drwxr-xr-x   3 root root 4.0K Dec 12 06:32 home
drwxr-xr-x   3 root root 4.0K Dec 12 06:27 media
drwxr-xr-x   2 root root 4.0K Dec 12 06:27 mnt
drwxr-xr-x  11 root root 4.0K Dec 12 06:27 var
when backing up from one virtual hard drive to another very similar one,
mount the source disk with mount -r
We are not worried about permissions and symlinks, so use rsync -rcv --inplace --append-verify
If worried about permissions and symlinks rsync -acv --inplace --append-verify
There is some horrid bug with rsync -acv --inplace --append-verify that makes it excruciatingly slow if you are copying a lot of data.
cp -vuxr «source-dir»/«.bit*» «dest-dir» should have similar effect,
but perhaps considerably faster, but it checks only the times, which may
be disastrous if you have been using your backup live any time after you
used the master live. After backing up, run your backup live once briefly,
before using the backed up master, then never again till the next backup.
Install, as always, with no internet connected, so that you get the UI to create a local user with no password.
Remove bloat and disable spyware with the tool provided by https://github.com/christopherhowe02/Debloat10
Setting up an actual server is similar to setting up the virtual machine modelling it, except you have to worry about the server getting overloaded and locking up.
On an actual server, it is advisable to enable passwordless sudo for one user.
issue the command visudo and edit the sudoers file to contain the line:
%sudo ALL=(ALL) NOPASSWD:ALLWhich means sudoers do not have to enter a password.
Check that none of the files /etc/sudoers.d/* helpfully undo what you just did. If they do, delete them.
If visudo or the files /etc/sudoers.d/* have a wheel group, then give the wheel group
the privilege of passwordless sudo, add your primary user to the wheel group, and continue
to require entering the password over and over and over again from the sudo group.
Add your primary user to the sudoers group: usermod -a -G sudo «username»
That user can now sudo any root command, with no password login nor
ssh in for root. And can also get into the root shell with sudo su -l root
On an actual server, you may want to totally disable passwords to accounts that have sensitive information. Unfortunately any method for totally disabling passwords is likely to totally disable ssh login, because the people writing the software have “helpfully” decided that that is what you probably intended, even though it is seldom what people want, intend, or expect. So the nearest thing you can do is set a long, random, non memorable password, and forget it.
If a server is configured with an ample swap file an overloaded server will lock up and have to be ungracefully powered down, which can corrupt the data on the server. If the swap file is inadequate, the OOM killer will shut down processes, which is also very bad, but does not risk losing data. So by default, servers tend to be out of the box configured with a grossly inadequate swap file, so that they will fail gracefully under overload, rather than locking up, needing to be powered down, and then needing to be recreated from scratch because of data corruption.
This looks to me like a kernel defect. The kernel should detect when it is thrashing the swap file, and respond by sleeping entire processes for lengthy and growing periods, and logging these abnormally long sleeps on wake. Swapping should never escalate to lockup, and if it does, bad memory management design, though this misfeature seems common to most operating systems.
When the OS detects the cpu idling while waiting for pages to be loaded into memory, should disable one process so its pages do not get loaded for a while, and derank all pages in memory that belong to that process, and derank all pages that belong to processes waiting on that process. When the cpu has idle time, and nothing to do for enabled processes, because everything they need has been done, and is only awaiting for disabled processes to get their pages loaded, then the OS can re-enable a disabled process, whereupon its virtualed paged get loaded back into physical memory, possibly resulting in some other process starting to thrash and getting disabled. So instead paging out the least recently used page, pages out an entire process, and stalls it until the cpu is adequately responsive to the remaining processes, and has been adequately responsive for a little while. This is inefficient, but it is a lot more efficient than a computer thrashing on paging. If the computer is stalling waiting on page load, then it is just running more processes than it can run, and the least recently used page algorithm is not going to accomplish anything useful. Some entire processes just have to be paged out, and stay paged out, until the remaining processes have completed and are idling. A thrashing computer is not running anything at all. Better that is run some things, and from time to time changes those things.
When the cpu has nothing to do because all the processes are waiting for pages to be loaded, something has to be done.
I prefer an ample swap file, larger than total memory, plus thrash protect,
which will result in comparatively graceful degradation, plus the existence of
the file /tmp/thrash-protect-frozen-pid-list will tell you that your
overloaded server is degrading (if it is not degrading, the file exists only briefly).
To have it look like a cloud server, but one you can easily snapshot and restore, set it up in bridged mode. Note the Mac address. After having it is running as a normal system, and you can browse the web with it, after guest additions and all that, then shut it down, go to your router, and give it a new static IP and a new entry in hosts.
Then configure ssh access to root. so that you can go ssh <server>as
if on your real cloud system. See setting up a server in the cloud
On a system that only I have physical access to and which runs no services that can be accessed from outside my local network my username is always the same and the password always a short easily guessed single word. Obviously if your system is accessible to the outside world, you need a strong password. An easy password could be potentially really bad if we have openssh-server installed, and ssh can be accessed from outside. If building a headless machine with openssh-server (the typical cloud or remote system) then need to set up public key sign in only, if the machine should contain anything valuable. Passwords are just not good enough – you want your private ssh key on a machine that only you have physical access to, and runs no services that anyone on the internet has access to, and which you don’t use for anything that might get it infected with malware, and you use that private key to access more exposed machines by ssh public key corresponding to that private key.
apt-get -qy update && apt-get -qy upgrade
# Fetches the list of available updates and
# strictly upgrades the current packages
To automatically start virtual boxes on bootup, which we will need to do if publishing them, Open VirtualBox and right click on the VM you want to autostart, click the option to create a shortcut on the desktop, cut the shortcut. Open the windows 10“Run” box (Win+R) and enter shell:startup Paste the shortcut. But all this is far too much work if we are not publishing them.
If a virtual machine is always running, make sure that the close default is to save state, for otherwise shutdown might take too long, and windows might kill it when updating.
If we have a gui, don’t do openssh. Terminal comes up with Ctrl Alt T
/usr
/usr/bin- Non-essential command binaries (not needed in single user mode); for all users.
/usr/include- Standard include files grouped in subdirectories, for example
/usr/include/boost/usr/lib- Libraries for the binaries in /usr/bin and /usr/sbin.
/usr/lib<qual>- Alternate format libraries, e.g. /usr/lib32 for 32-bit libraries on a 64-bit machine (option)
/usr/local- Tertiary hierarchy for local data, specific to this host. Typically has further subdirectories, e.g., bin, lib, share.
/usr/sbin- Non-essential system binaries, e.g., daemons for various network-services. Blockchain daemon goes here.
/usr/share- Architecture-independent (shared) data. Blockchain goes in a subdirectory here.
/usr/src- Source code. Generally release versions of source code. Source code that the particular user is actively working on goes in the particular user’s
~/src/directory, not this directory.~/.<program>- Data maintained by and for specific programs for the particular user, for example in unix
~/.Bitcoinis the equivalent of%APPDATA%\Bitcoinin Windows.~/.config/<program>- Config data maintained by and for specific programs for the particular user, so that the users home directory does not get cluttered with a hundred
.<program>directories.~/.local/<program>- Files maintained by and for specific programs for the particular user.
~/src/- Source code that you, the particular user, are actively working on, the equivalent of
%HOMEPATH%\src\in Windows.
~/src/include- header files, so that they can be referenced in your source code by the expected header path, thus for example this directory will contain, by copying or hard linking, the
boostdirectory so that standard boost includes work.
When your hosing service gives you a server, you will probably initially
have to control it by password. And not only is this unsafe and lots of
utilities fail to work with passwords, but your local ssh client may well fail
to do a password login, endelessly offering public keys, when no
~/.ssh/authorized_keys file yet exists on the freshly created server.
To force your local client to employ passwords:
ssh -o PreferredAuthentications=password -o PubkeyAuthentication=no -o StrictHostKeyChecking=no root@«server»And then the first thing you do on the freshly initialized server is
apt update -qy
apt upgrade -qy
shutdown -r now && exit
And the next thing you do is login again and set up login by ssh key, because if you make changes and then update, things are likely to break (because your hosting service likely installed a very old version of linux).
Login by password is second class, and there are a bunch of esoteric special cases where it does not quite 100% work in all situations, because stuff wants to auto log you in without asking for input.
Putty is the windows ssh client, but you can use the Linux ssh client in
windows in the git bash shell, which is way better than putty, and the
Linux remote file copy utility scp is way better than the putty utility
PSFTP, and the Linux remote file copy utility rsync way better than
either of them, though unfortunately rsync does not work in the windows bash shell.
The filezilla client works natively on both windows and linux, and it is very good gui file copy utility that, like scp and rsync, works by ssh (once you set up the necessary public and private keys.) Unfortunately on windows, it insists on putty format private keys, while the git bash shell for windows wants linux format keys.
Usually a command line interface is a pain and error prone, with a multitude of mysterious and inexplicable options and parameters, and one typo or out of order command causing your system to unrecoverably die,but even though Putty has a windowed interface, the command line interface of bash is easier to use.
(The gui interface of filezilla is the easiest to us, but I tend not to bother setting up the putty keys for it, and wind up using rsync linux to linux, which, like all comand line interfaces is more powerful, but more difficult and dangerous)
It is easier in practice to use the bash (or, on Windows, git-bash) to manage keys than PuTTYgen. You generate a key pair with
ssh-keygen -t ed25519 -f ssh_host_ed25519_key(I don’t trust the other key algorithms, because I suspect the NSA has been up to cleverness with the details of the implementation.)
On windows, your secret key should be in %HOMEPATH%/.ssh, on linux
in /home/«username»/.ssh, as is your config file for your ssh client, listing
the keys for hosts. The public keys of your authorized keys are in
/home/«username»/.ssh/authorized_keys, enabling you to login from afar as
that user over the internet. The linux system for remote login is a cleaner
and simpler system that the multitude of mysterious, complicated, and
failure prone facilities for remote windows login, which is a major reason
why everyone is using linux hosts in the cloud.
In Debian, I create the directory ~/.ssh for the user, and, using the
editor nano, the file authorized_keys
mkdir ~/.ssh
nano ~/.ssh/authorized_keys
chmod 700 .ssh
chmod 600 .ssh/*
I set the ssh session host IP under /Session, the auto login username under /Connection/data, the autologin private key under /Connection/ssh/Auth.
If I need KeepAlive I set that under /Connection
I make sure auto login works, which enables me to make ssh do all sorts of
things, then I disable ssh password login, restrict the root login to only be
permitted via ssh keys.
In order to do this, open up the sshd_config file (which is ssh daemon
config, not ssh_config. If you edit this into the ssh_config file
everything goes to hell in a handbasket. ssh_config is the global
.ssh/config file):
nano /etc/ssh/sshd_configYour config file should have in it
HostKey /etc/ssh/ssh_host_ed25519_key
PermitRootLogin prohibit-password
PubkeyAuthentication yes
PasswordAuthentication no
UsePAM no
ChallengeResponseAuthentication no

AllowAgentForwarding yes
AllowTcpForwarding yes
GatewayPorts yes
X11Forwarding yes
TCPKeepAlive yes
PermitTunnel yes

ciphers chacha20-poly1305@openssh.com
macs hmac-sha2-256-etm@openssh.com
kexalgorithms curve25519-sha256
pubkeyacceptedkeytypes ssh-ed25519
hostkeyalgorithms ssh-ed25519
hostbasedacceptedkeytypes ssh-ed25519
casignaturealgorithms ssh-ed25519

# no default banner path
Banner none
PrintMotd no

# Allow client to pass locale environment variables
AcceptEnv LANG LC_*

# override default of no subsystems
Subsystem       sftp    /usr/lib/openssh/sftp-server
PermitRootLogin defaults to prohibit-password, but best to set it
explicitly Within that file, find the line that includes
PermitRootLogin and if enabled modify it to ensure that users can only
connect with their ssh key.
ssh out of the box by default allows every cryptographic algorithm under the sun, but we know the NSA has been industriously backdooring cryptographic code, sometimes at the level of the algorithm itself, as with their infamous elliptic curves, but more commonly at the level of implementation and api, ensuring that secure algorithms are used in a way that is insecure against someone who has the backdoor, insecurely implementing secure algorithms. On the basis of circumstantial evidence
and social connections, I believe that much of the cryptographic code used
by ssh has been backdoored by the nsa, and that this is a widely shared
secret.
They structure the api so as to make it overwhelmingly likely that the code will be used insecurely, and subtly tricky to use securely, and then make sure that it is used insecurely. It is usually not that the core algorithms are backdoored, as that the backdoor is on a more human level, gently steering the people using core algorithms into a hidden trap.
The backdoors are generally in the interfaces between layers, the apis, which are subtly mismatched, and if you point at the backdoor they say “that is not a backdoor, the code is fine, that issue is out of scope. File a bug report against someone else’s code. Out of scope, out of scope.”
And if you were to file a bug report against someone else’s code, they would tell you they are using this very secure NSA approved algorithm with the approved and very secure api, the details of the cryptography are someone else’s problem, “out of scope, out of scope”, and they have absolutely no idea what you are talking about, because what you are talking about is indeed very obscure, subtle, complicated, and difficult to understand. The backdoors are usually where one api maintained by one group is using a subtly flawed api maintained by another group.
The more algorithms permitted, the more places for backdoors. The certificate algorithms are particularly egregious. Why should we ever allow more than one algorithm, the one we most trust?
Therefore, I restrict the allowed algorithms to those that I actually use, and only use the ones I have reason to believe are good and securely implemented. Hence the lines:
ciphers chacha20-poly1305@openssh.com
macs hmac-sha2-256-etm@openssh.com
kexalgorithms curve25519-sha256
pubkeyacceptedkeytypes ssh-ed25519
hostkeyalgorithms ssh-ed25519
hostbasedacceptedkeytypes ssh-ed25519
casignaturealgorithms ssh-ed25519
Not all ssh servers recognize all these configuration options, and if you
give an unrecognized configuration option, the server dies, and then you
cannot ssh in to fix it. But they all recognize the first three, HostKey, ciphers, macs which are the three that matter the most.
To put these changes into effect:
shutdown -r nowNow that putty can do a non interactive login, you can use plink to have a
script in a client window execute a program on the server, and echo the
output to the client, and psftp to transfer files, though scp in the Git Bash
window is better, and rsync (Unix to Unix only, requires rsync running on
both computers) is the best. scp and rsync, like git, get their keys from
~/.ssh/config
On windows, FileZilla uses putty private keys to do scp. This is a much more user friendly and safer interface than using scp – it is harder to issue a catastrophic command, but rsync is more broadly capable.
Life is simpler if you run FileZilla under linux, whereupon it uses the same keys and config as everyone else.
All in all, on windows, it is handier to interact with Linux machines
using the Git Bash command window, than using putty, once you have set
up ~/.ssh/config on windows.
Of course windows machines are insecure, and it is safer to have your
keys and your ~/.ssh/config on Linux.
Putty on Windows is not bad when you figure out how to use it, but ssh
in Git Bash shell is better:
You paste stuff into the terminal window with right click, drag stuff
out of the terminal window with the mouse, you use nano to edit stuff in
the ssh terminal window.
Once your you can ssh into your cloud server without a password, you now need to update it and secure it with ufw. You also need rsync, to move files around
apt-get -qy update && apt-get -qy install build-essential module-assistant dialog rsync ufw
cat /etc/default/ufw | sed 's/^\#*[[:blank:]]*MANAGE_BUILTINS[[:blank:]]*=.*$/MANAGE_BUILTINS=yes/g' >tempufw
mv tempufw /etc/default/ufw
chmod 600 /etc/default/ufw
ufw status verbose
ufw disable
ufw default deny incoming && ufw default allow outgoing
ufw allow ssh  && ufw limit ssh/tcp
echo "Y
" |ufw enable && ufw status verboseThis is done by xrdp and a windowing system. I use Mate
The server should not boot up with the windowing system running because it mightily slows down boot, sucks up lots of memory, and because you cannot get at the desktop created at boot through xrdp – it runs a different instance of the windowing system.
The server should not be created as a windowing system, because the default install creates no end of mysterious defaults differently on a multi user command line system to what it does in desktop system, which is configured to provide various things convenient and desirable in a system like a laptop, but undesirable and inconvenient in a server. You should create it as a server, and install the desktop system later through the command line, over ssh, not through the install system’s gui, because the gui install is going to do mystery stuff behind your back.
Set up the desktop after you have remote access over ssh working At this point, you should no longer be using the keyboard and screen you used to install linux, but a remote keyboard and screen.
apt update && apt upgrade -y
apt install mate-desktop-environment
# on ubuntu apt install ubuntu-mate-desktop
systemctl get-default
systemctl set-default multi-user.target
# on a system that was created as a server,
# set-default graphical-target
# may not work anyway
apt install xrdp -y
systemctl start xrdp
systemctl status xrdp
systemctl stop xrdp
usermod -a -G ssl-cert xrdp
systemctl start xrdp
systemctl status xrdp
systemctl enable xrdp
ufw allow 3389
ufw reload
This does not result in, or even allow, booting into mate desktop, because it does not supply the lightdm, X-windows and all that. It enables xrdp to run the mate desktop remotely
xrdp has its graphical login manager in place of lightdm, and does not have anything to display x-windows locally.
If you want the option of locally booting int mate desktop you also want lightDM and local X11, which is provided by:
apt update && apt upgrade -y
apt install task-mate-desktop
$ systemctl status xrdp
● xrdp.service - xrdp daemon
Loaded: loaded (/lib/systemd/system/xrdp.service; enabled; vendor preset: enabled)
Active: active (running) since Sat 2024-01-06 20:38:07 UTC; 1min 19s ago
Docs: man:xrdp(8)
man:xrdp.ini(5)
Process: 724 ExecStartPre=/bin/sh /usr/share/xrdp/socksetup (code=exited, status=0/S>
Process: 733 ExecStart=/usr/sbin/xrdp $XRDP_OPTIONS (code=exited, status=0/SUCCESS)
Main PID: 735 (xrdp)
Tasks: 1 (limit: 2174)
Memory: 1.4M
CPU: 19ms
CGroup: /system.slice/xrdp.service
└─735 /usr/sbin/xrdp
systemd[1]: Starting xrdp daemon...
xrdp[733]: [INFO ] address [0.0.0.0] port [3389] mode 1
xrdp[733]: [INFO ] listening to port 3389 on 0.0.0.0
xrdp[733]: [INFO ] xrdp_listen_pp done
systemd[1]: xrdp.service: Can't open PID file /run/xrdp/xrdp.pid >
systemd[1]: Started xrdp daemon.
xrdp[735]: [INFO ] starting xrdp with pid 735
xrdp[735]: [INFO ] address [0.0.0.0] port [3389] mode 1
xrdp[735]: [INFO ] listening to port 3389 on 0.0.0.0
xrdp[735]: [INFO ] xrdp_listen_pp donersync is the openssh utility to synchronize directories locally and
remotely.
Assume rsync is installed on both machines, and you have root logon
access by openssh to the remote_host
Shutdown any daemons that might cause a disk write during backup, which would be disastrous. Login as root at both ends or else files cannot be accessed at one end, nor permissions preserved at the other.
rsync -aAXvzP --delete remote_host:/ --exclude={"/dev/*","/proc/*","/sys/*","/tmp/*","/run/*","/media/*","/lost+found"} local_backupOf course, being root at both ends enables you to easily cause catastrophe at both ends with a single typo in rsync.
To simply logon with ssh
ssh remote_hostTo synchronize just one directory.
rsync -aAXvzP --delete remote_host:~/name .To make sure the files are truly identical:
rsync -aAXvzc --delete «example.com»:~/name .rsync, ssh, git and so forth know how to logon from the
~/.ssh/config(not to be confused with /etc/ssh/sshd_config or
/etc/ssh/ssh_config
Host remote_host
HostName remote_host
Port 22
IdentityFile ~/.ssh/id_ed25519
User root
ServerAliveInterval 60
TCPKeepAlive yes
Git on windows users %HOMEPATH/.ssh/config and that is how it knows
what key to use
To locally do a backup of the entire machine, excluding of course your
/local_backup directory which would cause an infinite loop:
rsync -raAvX --delete /
    --exclude={"/dev/*","/proc/*","/sys/*","/tmp/*","/run/*","/local_backup/*",/
    "/media/*","/lost+found"} /local_backup
The a and X options means copy the exact file structure with permission and all that recursively, The z option is for compression of data in motion. The data is uncompressed at the destination, so when backing up local data locally, we don’t use it.
To locally just copy stuff from the Linux file system to the windows file system
rsync -acv --del source dest/Which will result in the directory structure dest/source
To merge two directories which might both have updates:
rsync -acv source dest/A common error and source of confusion is that:
rsync -a dir1/ dir2means make dir2 contain the same contents as dir1, while
rsync -a dir1 dir2is going to put a copy of dir1 inside dir2
Since a copy can potentially take a very long time, you need the -v flag.
The -P flag (which probably should be used with the -c flag) does incremental backups, just updating stuff that has been changed. The -z flag does compression, which is good if your destination is far away.
To bring up apache virtual hosting
Apache2 html files are at /var/www/<domain_name>/.
Apache’s virtual hosts are:
/etc/apache2/sites-available
/etc/apache2/sites-enabled
The apache2 directory looks like:
    apache2.conf
    conf-available
    conf-enabled
    envvars
    magic
    mods-available
    mods-enabled
    ports.conf
    sites-available
    sites-enabled
The sites-available directory looks like
    000-default.conf
    «example.com».conf
    default-ssl.conf
The sites enabled directory looks like
    000-default.conf -> ../sites-available/000-default.conf
    «example.com»-le-ssl.conf
    «example.com».conf
And the contents of «example.com».conf are (before the https thingly has worked its magic)
    <VirtualHost *:80>
        ServerName «example.com»
        ServerAlias www.«example.com»
        ServerAlias «foo.«example.com»»
        ServerAlias «bar.«example.com»»
        ServerAdmin «me@mysite»
        DocumentRoot /var/www/«example.com»

        <Directory /var/www/«example.com»>
            Options -Indexes +FollowSymLinks
            AllowOverride All
        </Directory>

        ErrorLog ${APACHE_LOG_DIR}/«example.com»-error.log
        CustomLog ${APACHE_LOG_DIR}/«example.com»-access.log combined
    RewriteEngine on
        RewriteCond %{HTTP_HOST} ^www\.«example.com»\.com [NC]
        RewriteRule ^(.*)$ https://«example.com»/$1 [L,R=301]
    </VirtualHost>
All the other files don’t matter. The conf file gets you to the named server. The contents of /var/www/«example.com» are the html files, the important one being index.html.
To get free, automatically installed and configured, ssl certificates and configuration install certbot, then
certbot register --register-unsafely-without-email --agree-tos
certbot --apache
if you have set up http virtual apache hosts for every name supported by your nameservers, and only those names, certbot automagically converts these from http virtual hosts to https virtual hosts and sets up redirect from http to https.
If you have an alias server such as www.«example.com» for «example.com», certbot will guess you also have the domain name www.«example.com» and get a certificate for that.
Thus, after certbot has worked its magic, your conf file looks like
    <VirtualHost *:80>
        ServerName «example.com»
        ServerAlias foo.«example.com»
        ServerAlias bar.«example.com»
        ServerAdmin me@mysite
        DocumentRoot /var/www/«example.com»

        <Directory /var/www/«example.com»>
            Options -Indexes +FollowSymLinks
            AllowOverride All
        </Directory>

        ErrorLog ${APACHE_LOG_DIR}/«example.com»-error.log
        CustomLog ${APACHE_LOG_DIR}/«example.com»-access.log combined
    RewriteEngine on
        RewriteCond %{HTTP_HOST} ^www\.example\.com [NC]
        RewriteRule ^(.*)$ https://«example.com»/$1 [L,R=301]
        RewriteCond %{SERVER_NAME} =«example.com» [OR]
        RewriteRule ^ https://%{SERVER_NAME}%{REQUEST_URI} [END,NE,R=permanent]
</VirtualHost>systemctl stop apache2
apt-get remove --purge apache2 #apache is routinely installed by default,
# and then nginix tries to respect its files and configuration,
# with confusing and disturbing results.
# Apache must die. DIE DIE DIE.
apt-get upgrade
apt-get -qy update && apt-get -qy install ufw nginx mariadb-server php php-cli php-xml php-mbstring php-mysql php-fpm
nginx -t
ufw status verboseBrowse to your server, and check that nginx web page is working. Your browser will probably give you an error page, merely because it defaults to https, and https is not yet working. Make sure you are testing http, not https. We will get https working shortly..
ufw default deny incoming && ufw default allow outgoing
ufw allow ssh &&  ufw allow 'Nginx Full' && ufw limit ssh/tcp
# edit /etc/default/ufw so that MANAGE_BUILTINS=yes
cat /etc/default/ufw | sed 's/^\#*[[:blank:]]*MANAGE_BUILTINS[[:blank:]]*=.*$/MANAGE_BUILTINS=yes/g' >tempufw
mv tempufw /etc/default/ufw
# "no" is bug compatibility with software long obsolete
ufw enable && ufw status verbose
# Status: active
# Logging: on (low)
# Default: deny (incoming), allow (outgoing), disabled (routed)
# New profiles: skip
# To                         Action      From
# --                         ------      ----
# 22/tcp (SSH)               ALLOW IN    Anywhere
# 80,443/tcp (Nginx Full)    ALLOW IN    Anywhere
# 22/tcp                     LIMIT IN    Anywhere
# 22/tcp (SSH (v6))          ALLOW IN    Anywhere (v6)
# 80,443/tcp (Nginx Full (v6)) ALLOW IN    Anywhere (v6)
# 22/tcp (v6)                LIMIT IN    Anywhere (v6)
mariadb_secure_installation
#empty root password
#Don't set a root password
#remove anonymous users
#disallow remote login
#drop test database
mariadb
You should now receive a message that you are in the mariadb console
CREATE DATABASE example_database;
GRANT ALL ON example_database.* TO  'example_user'@'localhost'
IDENTIFIED BY 'mypassword' WITH GRANT OPTION;
FLUSH PRIVILEGES;
exit
mariadb -u example_user --password=mypassword example_databaseCREATE TABLE todo_list ( item_id INT
AUTO_INCREMENT, content VARCHAR(255),
PRIMARY KEY(item_id) );
INSERT INTO todo_list (content) VALUES
("My first important item");
INSERT INTO todo_list (content) VALUES
("My second important item");
SELECT * FROM todo_list;
exitOK, MariaDB is working. We will use this trivial database and easily
guessed example_user with the easily guessed password
mypassword for more testing later. Delete him and his database
when your site has your actual content on it.
Check again that the default nginx web page comes up when you browse to the server.
Create the directories /var/www/«subdomain.example.com» and /var/www/«example.com» and put some html files in them, substituting your actual domains for the example domains.
mkdir /var/www/«example.com» && nano /var/www/«example.com»/index.html
mkdir /var/www/«subdomain.example.com» && nano /var/www/«subdomain.example.com»/index.html
<!DOCTYPE html>
<html>
<head>
<meta charset="utf-8" />
</head>
<body><h1>«example.com» index file</h1></body>
</html>Delete the default in /etc/nginx/sites-enabled, and create a file, which I
arbitrarily name config that specifies how your domain names are to be
handled, and how php is to be executed for each domain names.
This config file assumes your domain is called «example.com» and your
service is called php-fpm.service. Create the following config file,
substituting your actual domains for the example domains, and your actual
php fpm service for the fpm service.
nginx -t
# find the name of your php fpm service
systemctl status php* | grep fpm.service
systemctl stop nginx
rm -v /etc/nginx/sites-enabled/*
nano /etc/nginx/sites-enabled/config
server {
return 301 $scheme://«example.com»$request_uri;
}
server {
listen 80;
listen [::]:80;
index index.php index.html;
server_name «subdomain.example.com»;
root /var/www/«subdomain.example.com»;
index index.php index.html;
location / {
try_files $uri $uri/ =404;
}
location ~ \.php$ {
include snippets/fastcgi-php.conf;
fastcgi_pass unix:/run/php/php-fpm.sock;
}
location = /favicon.ico {access_log off; }
location = /robots.txt {access_log off; allow all; }
location ~* \.(css|gif|ico|jpeg|jpg|js|png)$ {
expires max;
}
}
server {
listen 80;
listen [::]:80;
index index.php index.html;
server_name «example.com»;
root /var/www/«example.com»;
location / {
try_files $uri $uri/ =404;
}
location ~ \.php$ {
include snippets/fastcgi-php.conf;
fastcgi_pass unix:/run/php/php-fpm.sock;
}
location = /favicon.ico {access_log off; }
location = /robots.txt {access_log off; allow all; }
location ~* \.(css|gif|ico|jpeg|jpg|js|png)$ {
expires max;
}
}
server {
server_name *.«subdomain.example.com»;
return 301 $scheme://«subdomain.example.com»$request_uri;
}The first server is the default if no domain is recognized, and redirects the
request to an actual server, the next two servers are the actual domains
served, and the last server redirects to the second domain name if the
domain name looks a bit like the second domain name. Notice that this
eliminates those pesky wwws.
The root tells it where to find the actual files.
The first location tells nginx that if a file name is not found, give a 404 rather than doing the disastrously clever stuff that it is apt to do, and the second location tells it that if a file name ends in .php, pass it to php-fpm.sock (you did substitute your actual php fpm service for php-fpm.sock, right?)
Now check that your configuration is OK with nginx -t, and restart nginx to read your configuration.
nginx -t
systemctl restart nginx
Browse to those domains, and check that the web pages come up, and that www gets redirected.
Now we will create some php files in those directories to check that php works.
echo "<?php phpinfo(); ?>" |tee /var/www/«example.com»/info.phpThen take a look at info.php in a browser.
If that works, then create the file /var/www/«example.com»/index.php containing:
<?php
    $user = "example_user";
    $password = "mypassword";
    $database = "example_database";
    $table = "todo_list";
    try {
        $db = new PDO("mysql:host=localhost;dbname=$database", $user, $password);
        echo "<h2>TODO</h2><ol>";
        foreach($db->query("SELECT content FROM $table") as $row) {
            echo "<li>" . $row['content'] . "</li>";
            }
            echo "</ol>";
            }
    catch (PDOException $e) {
        print "Error!: " . $e->getMessage() . "<br/>";
        die();
        }
    ?>
Browse to http://«example.com» If that works, delete the info.php file as it reveals private information. You now have domain names being served
by lemp. Your database now is accessible over the internet through PHP
on those domain names.
SSL encrypts communication between your server and the client, so that those in between cannot read it or change it.
It also somewhat protects against malicious people fooling the client into connecting to the wrong server. Unfortunately there are a thousand certificate authorities, and some of them are malicious or hostile, and if you have powerful enemies (and who cares about powerless enemies) they will cheerfully issue a certificate your enemy for your domain name. DNSSEC somewhat protects against this, since there is only one root of trust
If you are reading this document, you are self hosting, in which case your registrar is probably providing your nameservers, in which case it is easy for them to set up DNSSEC for you. You just have to click the correct button on their website. One click, and it is done. And now you only have to worry about two parties that might potentially defect on you, the DNSSEC and your registrar, instead of a thousand certificate authorities.
If, however, someone other than your registrar is managing your nameserver, if your DNS records live on a machine controlled by one entity, and your nameserver is controlled by a different entity, attempting to set up DNNSEC gets complicated, and if that someone is not you, considerably more complicated. In this case setting up DNSSEC is like setting up SSH, but when you are setting up SSH, you control both machines. When you attempt to setup DNSSEC you don’t. Don’t even try. If you do try, make very sure the nameserver is doing the right thing before you submit the DNSSEC public key you generated to the registrar and attempt to get the registrar to do the right thing.
OK, DNSSEC was easy. (Or you just gave up because far too hard.) Now on to SSL
Create the necessary DNS records, an A record pointing to your IP4 address, an AAAA record pointing to your IP6 address, a CAA record indicating who is the right issuer for your SSL certificate, so that not every certificate authority in the world is allowed to issue fake certificates for your enemies, and CNAME records for the www and git aliases.
The CAA record looks like:
@ CAA 0 issue "letsencrypt.org"Go to whatsmydns and check if it looks right.
Certbot provides a very easy utility for installing ssl certificates, and if your domain name is already publicly pointing to your new host, and your new host is working as desired, without, however, ssl/https that is great.
To get free, automatically installed and configured, ssl certificates and configuration install certbot, then
# first make sure that your http only website is working as
# expected on your domain name and each subdomain.
# certbots many mysterious, confusing, and frequently
# changing behaviors expect a working environment.
certbot register --register-unsafely-without-email --agree-tos
certbot --nginx
# This also, by default, sets up automatic renewal,
# and reconfigures everything to redirect to https
Not so great if you are setting up a new server, and want the old server to keep on servicing people while you set up the new server, so here is the hard way, where you prove that you, personally, control the DNS records, but do not prove that the server that certbot is modifying is right now publicly connected as that domain name.
(Obviously on your network the domain name should map to the new server. Meanwhile, for the rest of the world, the domain name continues to map to the old server, until the new server works.)
certbot register --register-unsafely-without-email --agree-tos
certbot run -a manual  --preferred-challenges dns -i nginx \
    -d «example.com» -d «subdomain.example.com»
nginx -t
This does not set up automatic renewal. To get automatic renewal going,
you will need to renew with the webroot challenge rather than the manual
once DNS points to this server.
This, --preferred-challenges dns, also allows you to set up wildcard
certificates, but it is a pain, and does not support automatic renewal.
Automatic renewal requires of wildcards requires the cooperation of
certbot and your dns server, and is different for every organization, so only
the big boys can play.
But if you are doing this, not on your test server, but on your live server, the easy way, which will also setup automatic renewal and configure your webserver to be https only, is:
certbot --nginxIf instead you already have a certificate, because you copied over your
/etc/letsencrypt directory
apt-get -qy install certbot python-certbot-nginx
certbot install  -i nginx
nginx -t
To renew certbot certificates, which has to be done every couple of
months:
If you previously did the manual challenge, then certbot renew will likely
fail (because no default non manual challenge exists). You need to set the
renewal parameters for renewal to take place.
certbot renew --renew-by-default --http01Because certbot automatically renews using the previous defaults, you
have to have previously used a process to obtain certificate suitable for
automation, which mean you have to have given it the information
(--webroot --webroot-path /var/www/«example.com»)
about how to do an automatic renewal by actually obtaining a certificate that way.
To backup and restore letsencrypt, to move your certificates from one
server to another, rsync -HAvaX «example.com»:/etc/letsencrypt /etc, as root
on the computer which will receive the backup. The letsencrypt directory
gets mangled by tar, scp and sftp.
Again, browse to your server. You should get redirected to https, and https should work.
Backup the directory tree /etc/letsencrypt/, or else you can get into
situations where renewal is a problem. Only Linux to Linux backups work,
and they do not exactly work – things go wrong. Certbot needs to fix its
backup and restore process, which is broken. Apparently you should
backup certain directories but not others. But backing up and restoring the
whole tree works well enough for certbot install -i nginx
The certbot modified file for your ssl enabled domain should now look like
server {
    return 301 $scheme://«example.com»$request_uri;
    }
server {
    index index.php index.html;
    server_name «subdomain.example.com»;
    root /var/www/«subdomain.example.com»;
    index index.php;
    location / {
        try_files $uri $uri/ =404;
        }
    location ~ \.php$ {
        include snippets/fastcgi-php.conf;
        fastcgi_pass unix:/run/php/php-fpm.sock;
        }
    location = /favicon.ico {access_log off; }
    location = /robots.txt {access_log off; allow all; }
    location ~* \.(css|gif|ico|jpeg|jpg|js|png)$ {
        expires max;
        }
    listen [::]:443 ssl; # managed by Certbot
    listen 443 ssl; # managed by Certbot
    ssl_certificate /etc/letsencrypt/live/«example.com»/fullchain.pem; # managed by Certbot
    ssl_certificate_key /etc/letsencrypt/live/«example.com»/privkey.pem; # managed by Certbot
    include /etc/letsencrypt/options-ssl-nginx.conf; # managed by Certbot
    ssl_dhparam /etc/letsencrypt/ssl-dhparams.pem; # managed by Certbot
    }
server {
    index index.html;
    server_name «example.com»;
    root /var/www/«example.com»;
    location / {
        try_files $uri $uri/ =404;
        }
    location ~ \.php$ {
        include snippets/fastcgi-php.conf;
        fastcgi_pass unix:/run/php/php-fpm.sock;
        }
    location = /favicon.ico {access_log off; }
    location = /robots.txt {access_log off; allow all; }
    location ~* \.(css|gif|ico|jpeg|jpg|js|png)$ {
        expires max;
        }
    listen [::]:443 ssl ipv6only=on; # managed by Certbot
    listen 443 ssl; # managed by Certbot
    ssl_certificate /etc/letsencrypt/live/«example.com»/fullchain.pem; # managed by Certbot
    ssl_certificate_key /etc/letsencrypt/live/«example.com»/privkey.pem; # managed by Certbot
    include /etc/letsencrypt/options-ssl-nginx.conf; # managed by Certbot
    ssl_dhparam /etc/letsencrypt/ssl-dhparams.pem; # managed by Certbot
    }
server {
    server_name *.«subdomain.example.com»;
    return 301 $scheme://«subdomain.example.com»$request_uri;
    }
server {
    server_name *.«example.com»;
    return 301 $scheme://«example.com»$request_uri;
    }
server {
    if ($host = «example.com») {
        return 301 https://$host$request_uri;
    } # managed by Certbot
    listen 80;
    listen [::]:80;
    server_name «example.com»;
    return 404; # managed by Certbot
    }
server {
    if ($host = «subdomain.example.com») {
        return 301 https://$host$request_uri;
    } # managed by Certbot
    listen 80;
    listen [::]:80;
    server_name «subdomain.example.com»;
    return 404; # managed by Certbot
    }
You may need to clean a few things up after certbot is done.
The important lines that certbot created in the file being ssl_certificate,
the additional servers listening on port 80 which exist to redirect http to https
servers listening on port 403, and that all redirects should be https instead
of $scheme (fix them if they are not).
nginx starts as root, but runs as unprivileged user www-data, who needs to
have read permissions to every relevant directory. If you want to give php
write permissions to a directory, or restrict www-data and pgp’s read
permissions to some directories and not others, you could do clever stuff with
groups and users, giving creating users that php scripts act as, and
making www-data a member of their group, but that is complicated and
easy to get wrong.
A quick fix is to chown -R www-data:www-data the directories that your
web server needs to write to, and only those directories, though I can hear security gurus gritting their teeth when I say this.
For all the directories that www-data merely needs to read:
find /var/www -type d -exec chmod 755 {} \;
find /var/www -type f -exec chmod 644 {} \;
Now you should delete the example user and the example database:
mariadb
REVOKE ALL PRIVILEGES, GRANT OPTION FROM
'example_user'@'localhost';
DROP USER 'example_user'@'localhost';
DROP DATABASE example_database;
exitapt-get -qy install php-curl php-gd php-intl php-mbstring php-soap php-xml php-xmlrpc zip php-zip
systemctl status php* | grep fpm.service
# restart the service indicated above
systemctl stop nginx
systemctl stop php-fpm.service
mariadbCREATE DATABASE wordpress DEFAULT CHARACTER SET
utf8mb4 COLLATE utf8mb4_unicode_ci;
GRANT ALL ON wordpress.* TO 'wordpress_user'@'localhost'
IDENTIFIED BY '«password»';
FLUSH PRIVILEGES;
exitThe lemp server block that will handle the wordpress domain needs to pass
urls to index.php instead of returning a 404. (Handle your 404s and
redirects issues with the Redirections Wordpress plugin, which is a whole
lot easier, safer, and more convenient than editing redirects into your
/etc/nginx/sites-enabled/* files.)
server {
    . . .
    location / {
        #try_files $uri $uri/ =404;
        try_files $uri $uri/ /index.php$is_args$args;
        }
    . . .
    }
nginx -t
mkdir temp
cd temp
curl -LO https://wordpress.org/latest.tar.gz
tar -xzvf latest.tar.gz
cp -v wordpress/wp-config-sample.php wordpress/wp-config.php
cp -av wordpress/* /var/www/«subdomain.example.com»
chown -R www-data:www-data /var/www/«subdomain.example.com» && find /var/www -type d -exec chmod 755 {} \; && find /var/www -type f -exec chmod 644 {} \;
# so that wordpress can write to the directory
curl -s https://api.wordpress.org/secret-key/1.1/salt/
nano /var/www/«subdomain.example.com»/wp-config.phpReplace the defines that are there
define('LOGGED_IN_KEY', 'put your unique phrase here');
with the defines you just downloaded from wordpress.
and replace DB_NAME, DB_USER, DB_PASSWORD, and FS_METHOD
…
// ** Mariadb settings //
/** The name of the database for WordPress */
define('DB_NAME', 'wordpress');
/** MySQL database username */
define('DB_USER', 'wordpress_user');
/** MySQL database password */
define('DB_PASSWORD', '«password»');
/** MySQL hostname */
define( 'DB_HOST', 'localhost' );
/** Database Charset to use in creating database tables. */
define( 'DB_CHARSET', 'utf8mb4' );
/** The Database Collate type. */
define( 'DB_COLLATE', 'utf8mb4_unicode_ci' );
…
systemctl start nginxIt should now be possible to navigate to your wordpress domain in your web browser and finish the setup there:
Interacting directly with your database of the MariaDB command line is apt to lead to disaster.
Installing PhpMyAdmin has a little gotcha on Debian 9, which is covered in this tutorial, but I just do not use PhpMyAdmin even though it is easer and safer.
systemctl stop nginx
systemctl stop php-fpm.service
mdir temp && cd temp
fn=blogdb
db=wordpress
dbuser=wordpress_user
dbpass=«password»
mysqldump -u $dbuser --password=$dbpass $db > $fn.sql
head -n 30 $fn.sql
zip $fn.sql.zip $fn.sql
systemctl start php-fpm.service
systemctl start nginxIn the course of this operation, you will probably be copying lots of files, and will repeatedly muck up permissions. For wordpress to be happy:
chown -R root:www-data /var/www
# Set all directories to 775 (gives group write permission)
find /var/www -type d -exec chmod 775 {} \;
# Set all files to 664 (gives group write permission)
find /var/www -type f -exec chmod 664 {} \;
Prerequisite: you have configured Wordpress on Lemp
Copy everything from the web server source directory of the previous wordpress installation to the web server of the new wordpress installation.
chown -R www-data:www-data /var/www/«subdomain.example.com»
find /var/www -type d -exec chmod 775 {} \;
find /var/www -type f -exec chmod 664 {} \;
Replace the defines for DB_NAME, DB_USER, and DB_PASSWORD in wp_config.php, as described in Wordpress on Lemp
systemctl stop nginx
# we don’t want anyone browsing the blog while we are setting it up
# nor the wordpress update service running.
mariadb
DROP DATABASE IF EXISTS wordpress;
CREATE DATABASE wordpress DEFAULT CHARACTER SET utf8;
GRANT ALL ON wordpress.* TO 'wordpress_user'@'localhost'
IDENTIFIED BY '«password»';
exitAt this point, the database is still empty, so if you start nginx and browse to the blog, you will get the wordpress five minute install, as in Wordpress on Lemp. Don’t do that, or if you start nginx and do that to make sure everything is working, then start over by deleting and recreating the database as above.
Alternatively, if you want to merge this content into an blog that has
already been setup, perhaps an almost empty blog, you remove all the drop
table commands and create table commands from the sql, and replace all the INSERT INTO
statements with INSERT IGNORE INTO
Now we will populate the database.
tar -xvf wordpress.sql.zst
fn=wordpress
db=wordpress
dbuser=wordpress_user
dbpass=«password»
mariadb -u $dbuser --password=$dbpass $db < $fn.sql
mariadb -u $dbuser --password=$dbpass $db
SHOW TABLES;
SELECT COUNT(*) FROM wp_posts;
SELECT * FROM wp_posts l LIMIT 20;
exitAdjust $table_prefix = 'wp_'; in wp_config.php if necessary.
systemctl start nginxInside the sql file may be references to the old directories, (search for
'recently_edited'), and to the old user who had the privilege to create views
(search for DEFINER=) Replace them with the new directories and new
database user, in this example wordpress_user.
Edit the siteurl,admin_email and new_admin_email fields of the blog
database to the domain and new admin email.
mariadb -u $dbuser --password=$dbpass $db < $db.sql
mariadb -u $dbuser --password=$dbpass $db
SHOW TABLES;
SELECT COUNT(*) FROM wp_comments;
SELECT * FROM wp_comments l LIMIT 10;Adjust $table_prefix = 'wp_'; in wp_config.php if necessary.
systemctl start nginxYour blog should now work.
First create, in the standard and expected location, a place for nginx to log stuff.
mkdir /var/log/nginx
chown -R www-data:www-data /var/log/nginx
Then edit the virtual servers to be logged, which are in the directory /etc/nginx/sites-enabled and in this example in the file /etc/nginx/sites-enabled/config
server {
    server_name «example.com»;
    root /var/www/«example.com»;
    …
    access_log  /var/log/nginx/«example.com».access.log;
    error_log  /var/log/nginx/«example.com».error.log;
    …
    }
The default log file format logs the ips, which in a server located in the cloud might be a problem. People who do not have your best interests at heart might get them.
So you might want a custom format that does not log the remote address. On the other hand, Awstats is not going to be happy with that format. A compromise is to create a cron job that cuts the logs daily, a cron job that runs Awstats, and a cron job that then deletes the cut log when Awstats is done with it.
There is no point to leaving a gigantic pile of data, that could hang you and your friends, sitting around wasting space.
Postfix and Dovecot are a pile of matchsticks and glue from which you are expected to assemble a boat.
Probably I should be using one of those email setup packages that set up everything for you. Mailinabox seems to be primarily tested and developed on ubuntu, and is explicitly not supported on debian.
Mailcow however, is Debian. But Mailcow wants 6GiB of ram, plus one GiB swap, plus twenty GiB disk. Ouch. Mailinabox can get by with one GiB of ram, plus one GiB of swap. Says 512MiB is OK, though two GiB of ram is strongly recommended.
Mailinabox wants the domain name box.yourdomain.com, and, after it is
set up, wants the nameservers ns1.box.yourdomain.com and
ns2.box.yourdomain.com. They, fortunately, have a namecheap tutorial.
Linuxbabe, on the other hand, recommends iRedMail But iRedMail needs 4GiB and gets far less love from users than Mailinabox.
Postfix is a matter of installing it, but it expects an MX record in your nameserver, and quite a few other records are almost essential.
Postfix automagically does the right thing for users that have accounts, using their names and passwords to set up mailboxes. It gets complicated only when people start to pile supposedly more advanced mail systems, databases, and webmail on top of it.
With Postfix alone, you can receive emails at your server and have them automatically forwarded to a more useful email address. You can also receive, send, and reply to emails when logged in to you server using the command line utility, which I only use to make sure Postfix is working before I configure Dovecot on top of it.
To receive your emails in an actually useful form, you are going to have to forward them or set up a Dovecot service. Dovecot provides Pop3 and IMAP. Postfix does not provide any of that.
Postfix is not a Pop3 or IMAP server. It sends, receives, and forwards emails. You cannot set up an email client such as Thunderbird to remotely access your emails – they are only available to people logged in on the server who are never going to look at them anyway, because there is no useful UI to read them and reply to them.
So you have to configure three or more independent things, each of which has an endlessly complicated configuration that is intimately, arcanely, and obscurely connected to the configuration of each of the other things.
An MX record for «example.com» will read simply mail (no full stop, that
is for the case that you are trying to have a totally unrelated host handle
your mail) Check that it is working by using an MX lookup service such
as MX tools and Dig
You will need of course a corresponding CNAME record mail.
You are going to need a PTR record, or else you mail is likely to be rejected as spam.
The problem is that reverse DNS is not going the query the man who keeps your DNS records, but the man who gave you your IP address.
The UI for creating a PTR record is going to be in a different place, very likely maintained by a different man, using different software, than the UI for creating you MX record. It will have a link that is probably called something like “reverse” rather than PTR or DNS.
You look up your IP in MX tools or Dig
You must create the reverse DNS zone on the authoritative DNS nameserver for the IP address of your server. Which is controlled by whoever gave you your IP address, not whoever is maintaining your DNS records. You can find if your reverse IP is working by doing a reverse lookup in Dig.
Thus the instructions for setting up a PTR record that you find on the internet are unlikely to be applicable to you, and will only confuse you.
An MX record is useless, because apt to be massively spammed, without
a spf TXT record stating that mail only comes from your IP4 and IP6.
Otherwise your enemies will issue spam in your name, with the result that
your MX record will be blacklisted.
An spf record is of type TXT and looks like
v=spf1 ip4:69.64.153.131 ip6:DEAD:BEEF:DEAD:55a:0:0:0:1 -all
indicating that all mail under this domain
name will be sent from one and only one network address.
A DKIM record publishes a digital signature for sent mail, to prevent mail from being modified or fake mails being injected as it goes through the multiple intermediate servers.
By the time the ultimate recipient sees the email, no end of intermediate computers have had their hands on it, but pgp signing is obviously superior, since that is controlled by the actual sender, not one more intermediary. DKIM is the not quite good enough being the enemy of the good enough.
Worse, DKIM means that any email sent from your server is signed by your server, so if you send a private message, and someone defects on you by making it public, hard to claim that he is making it up. Sometimes you want your emails signed with a signature verifiable by third parties, and sometimes this is potentially dangerous. Gpg allows you to sign some things and not other things. DKIM means that everything gets signed, without you being aware of it.
DKIM renders all messages non repudiable, and some messages vitally need to be repudiable.
Gpg is better than DKIM, but has the enormous disadvantage that it cannot authenticate except by signing. If you send a message to a single recipient or a quite small number of recipients, you usually want him to know for sure it is from you, and has not been altered in transit, but not be able to prove to the whole world that it is from you.
A DMARK record can tell the recipient that mail from
«example.com» will always and only come senders like
user@«example.com». This can be an inconvenient restriction on
one’s ability to use a more relevant identity.
Further, intermediate servers keep manging messages sent through them, breaking the DKIM signatures, resulting in no end of spurious error messages
You want to stop other people’s email servers from misbehaving on the sender addresses. You don’t want to stop your server from misbehaving.
Trouble with SPF and DKIM is that, without DMARK, they have no impact on the sender address, thus don’t stop spearphishing attacks using your identity. They do stop spam attacks from getting your server blacklisted by using your server identity to send junk mail.
SPF is sufficient to stop your server from getting blacklisted, and largely irrelevant to preventing spearphishing. But SPF with DMARK at least does something about spearphishing, while DKIM with DMARK does a far more thorough job on spearphishing, but produces a lot of false warnings due to intermediate servers mangling the email in ways that invalidate the signature.
The only useful thing that DMARK can do is ensure address alignment with SPF and DKIM, so that only people who can perform an email login to your server can send email as someone who has such a login.
But DKIM is complicated to install, and a lot more complicated to manage because you will be endlessly struggling to resolve the problem of signatures being falsely invalidated. It may be far more effective against spearphishing if the end user pays attention, but if people keep seeing false warnings, they are being trained to ignore valid warnings.
A solution to all these problems is to use the value ed25519-sha256 for a= in the DKIM header
(which ensures that obsolete intermediaries will
ignore your DKIM, thus third parties will see fewer false warnings) and to
have a cron job that regularly rotates your DKIM keys, and publishes the
old secret key on the DNS 36 hours after it has been rotated out under the
n=OldSecret_... field of the DKIM record, thus rendering your emails
deniable. (RSA keys are inconveniently large for this protocol, since they
do not fit in a DNS record)
But that is quite bit of work, so I just have not gotten around to it. No one seems to have gotten around to it. Needs to be part of Mailinabox so that it becomes a standard.
Until you can install DKIM with a cron job that renders email repudiable, do not install DKIM. (And disable it if Mailinabox enables it.])
Here we will install postfix on debian so that it can be used to send emails by local users and applications only - that is, those installed on the same server as Postfix, such as your blog, mailutils, and Gitea, and can receive emails to those local users.
echo MAIL=Maildir>/etc/profile.d/maildir.sh && chmod +x /etc/profile.d/maildir.shStart up a new shell, so that $MAIL is correctly set
echo $MAIL
apt -qy update
apt -qy install mailutils
apt -qy install postfix
Near the end of the installation process, you will be presented with a window that looks like the one in the image below:
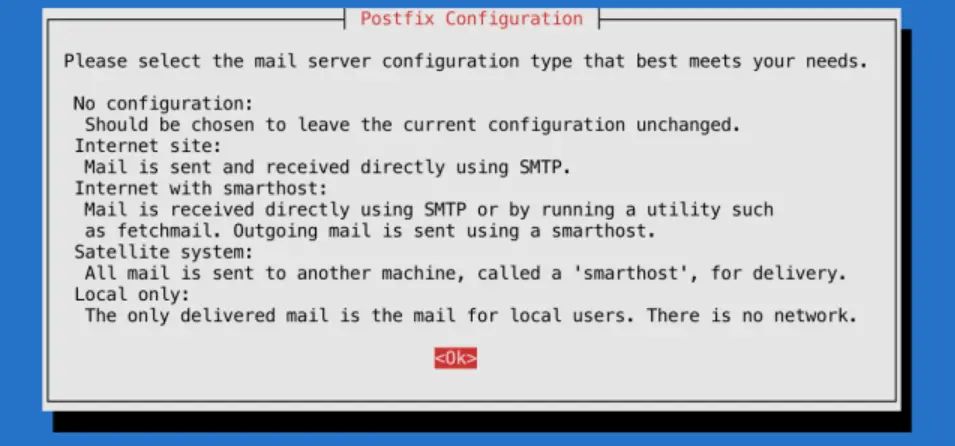 If
If <Ok> is not highlighted, hit tab.
Press ENTER to continue.
The default option is Internet Site, which is preselected on the following screen:
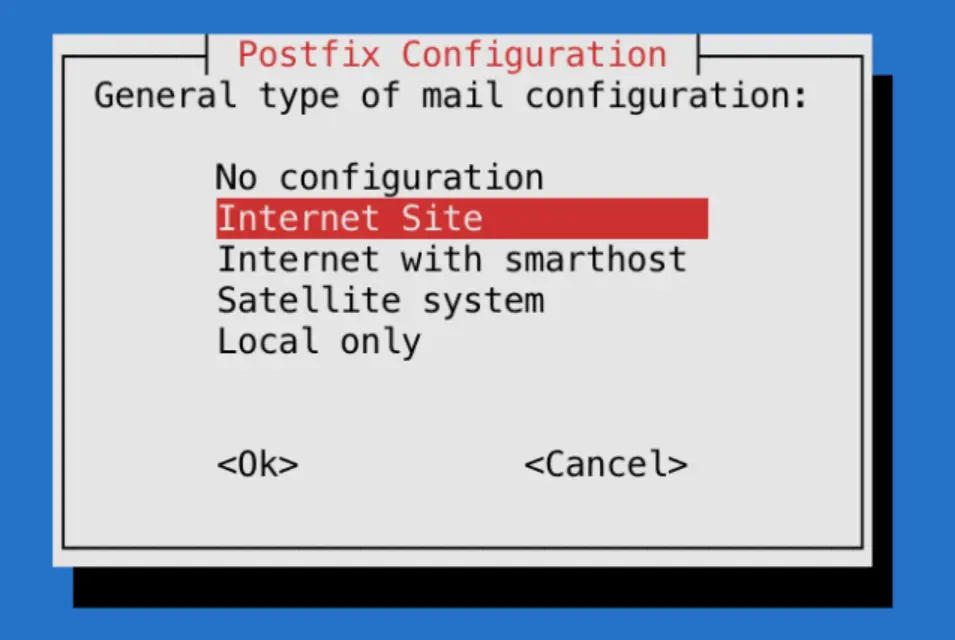 Press
Press ENTER to continue.
After that, you’ll get another window to set the domain name of the site that is sending the email:
 The
The System mail name should be the same as the name you assigned to the server when you were creating it. When you’ve finished, press TAB, then ENTER.
You now have Postfix installed and are ready to modify its configuration settings.
postconf -e home_mailbox=Maildir/Which is incompatible with lots of modern mail software, but a lot more compatible with all manner of programs trying to use Postfix, including Dovecot
Your forwarding file is, by default, broken. It forwards all administrative
system generated email to the nonroot local user deb10 who probably does
not exist on your system.
Set up forwarding, so you’ll get emails sent to root on the system at your
personal, external email address or to a suitable nonroot local user, or
create the local user deb10.
To configure Postfix so that system-generated emails will be sent to your
email address or to some other non root local user, you need to edit the
/etc/aliases file.
nano /etc/aliasesmailer-daemon: postmaster
postmaster: root
nobody: root
hostmaster: root
usenet: root
news: root
webmaster: root
www: root
ftp: root
abuse: root
noc: root
security: root
root: «your_email_address»After changing /etc/aliases you must issue the command newaliases to inform the mail system. (Rebooting does not do it.)
/etc/aliases remaps mail to users on your internal mail server, but likely your mail server is also the MX host for another domain. For this, you are going to need a rather more powerful tool, which I address later.
The postmaster: root setting ensures that system-generated emails are sent
to the root user. You want to edit these settings so these emails are rerouted
to your email address. To accomplish that, replace «your_email_address»
with your actual email address, or the name of a non root user.. Most systems do not allow email clients to
login as root, so you cannot easily access emails that wind up as root@mail.«example.com»
Probably you should create a user postmaster
If you’re hosting multiple domains on a single server, the other domains
must passed to Postfix using the mydestination directive if other people ware going tosend email addressed to users on those domains. But
chances are you also have other domains on another server, which declare in
their DNS this server as their MX record. mydestination is not the place
for the domain names of those servers, and putting them in mydestination
is apt to result in mysterious failures.
Those other domains, not hosted on this physical machine, but whose MX record points to this machine are virtual_alias_domains and postfix has to handle messages addressed to such users differently
Set the mailbox limit to an appropriate fraction of your total available disk space, and the attachment limit to an appropriate fraction of your mailbox size limit.
Check that myhostname is consistent with reverse ip search. (It should already be if you setup reverse IP in advance)
Set mydestination to all dns names that map to your server (it probably already does)
postconf -e mailbox_size_limit=268435456
postconf -e message_size_limit=67108864
postconf
postconf myhostname
postconf mydestination
postconf smtpd_banner
# you don't want your enemies to know what OS version you are running,
# as this may make hacking easier
postconf -e smtpd_banner='$myhostname ESMTP $mail_name'
postconf -e smtpd_helo_required=yes
postconf smtpd_helo_restrictions
postconf -e smtpd_helo_restrictions='permit_mynetworks, permit_sasl_authenticated, reject_invalid_helo_hostname,  reject_non_fqdn_helo_hostname, reject_unknown_helo_hostname'
postconf smtpd_sender_restrictions
postconf -e smtpd_sender_restrictions='permit_mynetworks, permit_sasl_authenticated, reject_unknown_sender_domain'
postconf smtpd_client_restrictions
postconf -e smtpd_client_restrictions=='permit_mynetworks, permit_sasl_authenticated, reject_unknown_reverse_client_hostname'
newaliases && systemctl restart postfix
# check that you have in fact set stuff as you intended
postconf -n
postfix check
ufw enable postfix
ufw status verbose
# port 25 should be open
ss -lnpt | grep master
# postfix should be listening on port 25
su -l «nonroot-user»
mail «you@some-email»
At this point mail should just work. Check your email at you@some-email and reply to it. Then check if you have received the reply.
cat  /var/log/mail.log
su -l «nonroot-user»
mail
If mail is not working, check the logs
Now email should be working with the command line utility.
Send email to local users and to your external email address using the command line utility mail. Check that you can read it.
Send in mail from and outside. Reply to that outside system, and check that your reply gets through.
To read mail from the command line mail, but reading and writing mail
using the command line utility is too painful, except for test purposes.
If you memorize lots of mail commands, it is usable, sort of.
Test your mail server using MX tools

Now you have a basic Postfix email server up and running. You can send plain text emails and read incoming emails using the command line.
After sending and receiving a few emails, check for issues:
cat  /var/log/mail.log | grep -E --color "warning|error|fatal|panic"
postqueue -p
If you see a pile of warnings warning symlink leaves directory: /etc/postfix/./makedefs.out that is just noise. Turn it off by replacing the symbolic link with a hard link
postfix check
rm /etc/postfix/makedefs.out; ln /usr/share/postfix/makedefs.out /etc/postfix/makedefs.out
postfix check
Or just ignore it.
Make sure that MX tools thinks your mail server is working.
Now you can send mail while logged in to your server, using the
command line program mail, programs running on your server can send
you or anyone else mail, and anyone can send mail to users that exist on
your server, which can be forwarded to actually useful email addresses.
But your email is in the clear, and can be read, or altered, by any unpleasant person between you and the destination that intends you harm or harm to those that you are messaging. Of which there are likely quite a lot. Such alterations are likely to result in your email server ending up blacklisted as a result of other people’s anti malware precautions.
cat  /var/log/mail.log | grep -E --color "warning|error|fatal|panic|TLS"
postqueue -p
You probably will not see any TLS activity. You want to configure Postfix to always attempt SSL, but not require it.
Modify /etc/postfix/main.cf using the postconf command:
# TLS parameters
#
# SMTP from other servers to yours
# Make sure to substitute your certificates in for the smtp
# and smtpd certificates.
postconf -e smtpd_tls_cert_file=/etc/letsencrypt/live/«example.com»/fullchain.pem
postconf -e smtpd_tls_key_file=/etc/letsencrypt/live/«example.com»/privkey.pem
postconf -e smtpd_tls_security_level = may
postconf -e smtpd_tls_auth_only = yes
postconf -e smtpd_tls_mandatory_protocols=!SSLv2,!SSLv3,!TLSv1, !TLSv1.1
postconf -e smtpd_tls_protocols=!SSLv2,!SSLv3, !TLSv1, !TLSv1.1
postconf -e smtpd_tls_loglevel = 1
postconf -e smtpd_use_tls=yes
postconf smtpd_tls_session_cache_database
# should be:
# smtpd_tls_session_cache_database = btree:${data_directory}/smtpd_scache
#
# SMTP from your server to others
postconf -e smtp_tls_cert_file=/etc/letsencrypt/live/«example.com»/fullchain.pem
postconf -e smtp_tls_key_file=/etc/letsencrypt/live/«example.com»/privkey.pem
postconf -e smtp_tls_security_level=may
postconf -e smtp_tls_note_starttls_offer=yes
postconf -e smtp_tls_mandatory_protocols='!SSLv2, !SSLv3, !TLSv1, !TLSv1.1'
postconf -e smtp_tls_protocols='!SSLv2, !SSLv3, !TLSv1, !TLSv1.1'
postconf -e smtp_tls_logleve=1
postconf smtp_tls_session_cache_database
# should be:
# smtp_tls_session_cache_database = btree:${data_directory}/smtp_scache
# end TLS parameters
systemctl restart postfix
The excluded ciphers are weak or suspect, and SSLv2, SSLv3 have known holes.
I have not bothered checking the list of permitted ciphers, many of which would doubtless horrify me, because email security is incurably broken, and trying to fix it is an endless and insoluble problem. SSH is more readily fixable.
Now send an email from one of your actually useful email accounts on your
client computer, and then, using the near unusable command line utility
mail, send a response.
cat /var/log/mail.log |grep TLSYou should now see some TLS activity for those emails, and you should receive the emails.
OK, now we are all done, unless you want people to send you emails at «username»@«example.com», and to be actually able to usefully read those emails without setting up forwarding to another address.
Well, not quite done, for now that you can receive emails, need to add your email to to your DMARC policy.
v=DMARC1; p=quarantine; rua=mailto:postmaster@«example.com»
A dmarc record is a text record with the hostname _dmarc, and the policy is its text value.
At this point any random person on the internet can send mail to
root@«example.com», and you can automatically forward it to an actually
usable email address, but you cannot access his email account at
root@«example.com» from a laptop using thunderbird, and accessing it
through the command line using mail is not very useful.
Because although Postfix by default accepts sasl authenticated mail submissions to be relayed anywhere
smtpd_relay_restrictions = permit_mynetworks permit_sasl_authenticated defer_unauth_destinationIt has yet as yet nothing configured to provide sasl authentication.
We don’t want random spammer on the internet to send email as
random@«example.com», but we do want authenticated users to be able to do
as they please.
So, need to install and configure Dovecot to provide sasl, to authenticate «username» to Postfix. And need to tell Postfix to accept Dovecot authentication.
However, before we do any of that, there is a very big problem, that all email systems that allow clients to send email are a bleeding security hole, because they do not use ssh. They instead use human memorable passwords. And, since we are using Dovecot in its simplest configuration they use your user login passwords. Which you did not care about until now, because everyone logs in by ssh and you have set it up to be impossible to login except by ssh. So you probably used short passwords easy to guess and easy to type.
But, once you install dovecot, every phisher, spammer and scammer on the internet will be trying to login as one of your users using lists of common passwords, and if he succeeds, is going to use your resources to send his spam or scam to everyone in the world.
Big email providers have big complex systems, which require a great deal
of work to set up and manage, to monitor this. You do not. So everyone
who is going to be able to send email, which is to say all users on your
system, has to have an unguessable password, ten or more characters of
unguessable gibberish, or six or more human readable words.
apt -y install libpam-pwquality
In addition to spammers, you will also, far less frequently, but far more dangerously, have spearphishers armed with inside information. So every user on your system has to have a strong password.
Most of the proposals for integrating Postfix and Dovecot seem to be endlessly complicated, endlessly different, pull in no end of additional programs, and endlessly incompatible with Postfix working just by itself. The basic problem is that Postfix was written assuming one actual user for each email address, and lots of software throws away this useless vestigial appendix, which breaks the now obsolete architecture of Postfix, and each such re-invention has complicated workarounds for this architectural break, each of which works in its own unique ad hoc way.
But, since we got the old fashioned architecture of Postfix working, and our primary interest is using it in programs that assume the old fashioned architecture, we have to stick to the path that email users are Linux users, to avoid getting into deep waters. We are going to map arbitrary email addresses to arbitrary users, but for someone to send and receive email, he has to have a user account on the server.
PAM is just old fashioned Unix logon passwords. Pop3s is just TLS secured pop3.
Install and set up Dovecot, now that postfix is working
Suppose you have another domain name, which has no host. Then you can make it a virtual alias domain on your actual host, or better, a virtual mailbox domain. Virtual mailboxes rely on dovecot to actually deliver the mail to the person who reads it on his desktop computer. Postfix abandons the delivery problem.
But suppose you have another domain, and another actual host, and you don’t want to go through all the grief involved in setting up email that works. So you have its MX record point to your email host, install postfix on it as a satellite system.
Then nothing happens. Oops
Since programs running on it are sending out emails in its domain name,
your primary host has to enable it to relay. The simplest way is to add
its IP address to your primary host’s mynetworks. Now programs running
on the other domain, such as wordpress, can send emails by relaying them
through the primary host, without them being suppressed in transit as spam.
There are rather a lot of options and alternatives, and if you go down the wrong path, you will get stuck.
If you are the only one with a virtual mailbox, might as well administer it by hand using only postfix, but if you have to go to virtual mailboxes, there are probably several people involved, in which case administering it just far too painful, both for you and those administered, better set up PostfixAdmin, and let those people administer themselves.
To be allowed to relay through the primary host, the other systems have to
be listed in mynetworks, listed as virtual hosts, or something. There are
rather too many ways to do it, but mynetworks just makes the issue go away.
Now that you have set this up, you don’t want to set it up for several domain name addresses corresponding to several hosts on the internet. You want to just put an MX record pointing to this host in that host’s DNS, so that people can send and receive email using that host’s domain name, regardless of whether a physical server with a network address exists for that domain name.
For each domain name that has an MX record pointing at this host add the
domain to the virtual_alias_domains in /etc/postfix/main.cf
postconf virtual_alias_domains
postconf -e virtual_alias_domains=«example.com»,«subdomain.example.com»
postconf -e virtual_alias_maps=hash:/etc/postfix/virtual
Now create the file /etc/postfix/virtual which will list all the email addresses of users with email addresses ending in those domain names.
ann@«example.com» ann
bob@«example.com» bob
carol@«subdomain.example.com» carol
dan@«subdomain.example.com» dan
@«example.com» blackhole
@«subdomain.example.com» blackhole
# ann, bob, carol, dan, and blackhole have to be actual users
# on the actual host, or entries in its aliases file, even if there
# is no way for them to actually login except through an
# email client, and if mail to blackhole goes unread and is
# eventually automatically deleted.
#
# The addresses without username catch all emails that do not
# have an entry.
# You don't want an error message response for invalid email
# addresses, as this may reveal too much to your enemies.
Every time your /etc/postfix/virtual is changed, you have to recompile it
into a hash database that postfix can actually use, with the command:
postmap /etc/postfix/virtual && postfix reloadWe have setup postfix and dovecot so that clients can only use ssl/tls, and not starttls.
On thunderbird, we go to account settings / account actions / add mail account
We then enter the email address and password, and click on configure manually
Select SSL/TLS and normal password
For the server, thunderbird will incorrectly propose .«subdomain.example.com»
Put in the correct value, «example.com», then click on re-test. Thunderbird will then correctly set the port numbers itself, which are the standard port numbers.
But the problem is, we might have an actual host running postfix, which wants to ask the host to which its MX record points, to send emails for it.
Configuring postfix as a satellite system just works, at least for emails generated by services running on the same machine, but postfix does not provide for it logging in. Instead, postfix assumes it has been somehow authorized, typically in mynetworks to relay.
Another way of setting it up, which I have not checked out, is postfix_relaying_through_another_mailserver
Your cloud server is going to keep timing you out and shutting you down,
so if using OpenSSH need to set up ~/.ssh/config to read
    ForwardX11 yes
    Protocol 2
    TCPKeepAlive yes
    ServerAliveInterval 10
Putty has this stuff in the connection configuration, not in the config file. Which makes it easier to get wrong, rather than harder.
Your cloud server is probably virtual private server, a vps running on KVM, XEN, or OpenVZ.
KVM is a real virtual private server, XEN is sort of almost a virtual server, and OpenVZ is a jumped up guest account on someone else’s server.
KVM vps is more expensive, because when they say you get 2048 meg, you actually do get 2048 meg. OpenVZ will allocate up to 2048 gig if it has some to spare – which it probably does not. So if you are running OpenVZ you can, and these guys regularly do, put far too many virtual private servers on one physical machine. Someone can have a 32 Gigabyte bare metal server with eight cores, and then allocate one hundred virtual servers each supposedly with two gigabytes and one core on it, while if he is running KVM, he can only allocate as much ram as he actually has.
Debian is significantly more lightweight than Ubuntu, harder to configure and use, will crash and burn if you connect up to a software repository configured for Ubuntu in order to get the latest and greatest software. You generally cannot get the latest and greatest software, and if you try to do so, likely your system will die on its ass, or plunge you into expert mode, where no one sufficiently expert can be found.
Furthermore, in the course of setting up Debian, highly likely to break it irretrievably and have to restart from scratch. After each change, reboot, and after each successful reboot, take a snapshot, so that you do not have to reboot all the way from scratch.
But, running stuff that is supposed to run, which not always the latest and greatest, is more stable and reliable than Ubuntu. Provided it boots up successfully after you have done configuring, will likely go on booting up reliably and not break for strange and unforeseeable reasons. Will only break because you try to install or reconfigure software and somehow screw up. Which you will do with great regularity.
On a small virtual server, Debian provides substantial advantages.
Go Debian with ssh and no GUI for servers, and Debian with lightdm Mate for your laptop, so that your local environment is similar to your server environment.
On any debian you need to run through the apt-get cycle till it stops updating:
apt-get -qy update && apt-get -qy upgrade
apt-get -qy install dialog dialog nano build-essential
apt-get -qy rsync linux-headers-generic
On windows, edit the command line of the startup icon for a virtual box that you have iconized to add the command line option --type headless, for example
"C:\Program Files\Oracle\VirtualBox\VirtualBoxVM.exe" --comment "vmname" --startvm --type headless "{873e0c62-acd2-4850-9faa-1aa5f0ac9c98}"To uninstall a package
apt-get -qy --purge remove <package>To uninstall a package without removing the settings
apt-get -qy remove <package>On your home computer, Ubuntu has significant ease of use advantages. On the cloud, where computing power costs and you are apt to have a quite large number of quite small servers, Debian has significant cost advantages, so perhaps should have Debian locally, despite its gross pain the ass problems, in order to have the same system in the cloud and locally.
Assuming you have a backup of the files and the database.
Create a freshly installed empty blog on the target site using one of the many easy Wordpress setups.
Copy over all the old files except wp_config.php
Edit the wp_config file so that the table_prefix agrees with the original blogs wp_config.php table_prefix.
Delete the new blog tables with new blog’s table prefix from the new blog’s database, and upload the old blog’s tables from the new blog’s database
Upload the sql file to the new blog database.
Should now just work.
The cross platform open source gcc compiler produces the best object code, but is not debugger friendly. The cross platform CLang is debugger friendly, but this is not that useful unless you are using an ide designed for Clang. Visual Studio has the best debugger – but you are going to have to debug on windows.
In Clang and gcc, use valgrind.
In Visual Studio, enable the CRT debugger.
#ifdef _MSC_VER
#ifdef _DEBUG
//  Testing for memory leaks under Microsoft Visual Studio
#define _CRTDBG_MAP_ALLOC
#include <stdlib.h>
#include <crtdbg.h>
#endif
#endif
At the start of program
#ifdef _MSC_VER
#ifdef _DEBUG
//  Testing for memory leaks under Microsoft Visual Studio
_CrtSetDbgFlag ( _CRTDBG_ALLOC_MEM_DF | _CRTDBG_LEAK_CHECK_DF );
#endif
#endif
At the end of program
#ifdef _MSC_VER
#ifdef _DEBUG
//  Testing for memory leaks under Microsoft Visual Studio
_CrtSetReportMode( _CRT_ERROR, _CRTDBG_MODE_DEBUG );
#endif
#endif
However, this memory leak detection is incompatible with wxWidgets, which does its own memory leak detection.
And since you are going to spend a lot of time in the debugger, Windows Visual Studio recommended as the main line of development. But, for cross compilation, wxWidgets recommended.
Code::Blocks (wxSmith GUI developer) is one open source cross platform which may be out of date.
wxSQLite3 incorporates SQLite3 into wxWidgets, also provides ChaCha20 Poly1305 encryption. There is also a wrapper that wraps SQLite3 into modern (memory managed) C++.
wxSQLite3 is undergoing development right now, indicating that wxWidgets
and SQLite3 are undergoing development right now. wxSmith is dead
Tk is still live, but you get confusingly directed to the dead version.
This design pattern separates the UI program from the main program, which is thus more environment independent and easier to move between different operating systems.
The Model-view-controller design pattern makes sense with peers on the server, and clients on the end user’s computer. But I am not sure it makes sense in terms of where the power is. We want the power to be in the client, where the secrets are.
So, a common design pattern is to put as much of the code as possible into the daemon, and as little into the gui.
Now it makes sense that the Daemon would be assembling and checking large numbers of transactions, but the client has to be assembling and checking the end user’s transaction, so this model looks like massive code duplication.
If we follow the Model-View-Controller architecture then the Daemon provides the model, and, on command, provides the model view to a system running on the same hardware, the model view being a subset of the model that the view knows how to depict to the end user. The GUI is View and Command, a graphical program, which sends binary commands to the model.
Store the master secret and any valuable secrets in GUI, since wxWidgets provides a secret storing mechanism. But the daemon needs to be able to run on a headless server, so needs to store its own secrets – but these secrets will be generated by and known to the master wallet, which can initialize a new server to be identical to the first. Since the server can likely be accessed by lots of people, we will make its secrets lower value.
We also write an (intentionally hard to use) command line view and command line control, to act as prototypes for the graphical view and control, and test beds for test instrumentation.
CMake is the best cross platform build tool, but my experience is that it is too painful to use, is not genuinely cross platform, and that useful projects rely primarily on autotools to build on linux, and on Visual Studio to build on Windows.
And since I rely primarily on a pile of libraries that rely primarily on autotools on linux and Visual Studio on windows …
Cmake in theory provides a universal build that will build stuff on both Windows and linux, but when I tried using it, was a pain and created extravagantly fragile and complicated makefiles.
Libsodium does not support CMake, but rather uses autotools on linux like systems and visual studio project files on Windows systems.
wxWidgets in theory supports CMake, but I could not get it working, and most people use wxWidgets with autotools on linux like systems, and visual studio project files on Windows systems. Maybe they could not get it working either.
Far from being robustly environment agnostic and shielding you from the unique characteristics of each environment, CMake seems to require a whole lot of hand tuning to each particular build environment to do anything useful.
Install 7zip.
Install Notepad++.
Install MinGW using TDM-GCC, as the MinGW install is user hostile, and the Code::Blocks install of MinGW broken. Also, wxWidgets tells you to use the TDM environment.
Download Git from Git for Windows and install it. (This is the successor to msysgit, which has a walkthrough.) Select Notepad++ as the editor.
Note that in any command line environment where one can issue Git
commands, the commands git gui and git gui citool are available.
Install MinGW using TDM-GCC, as the MinGW install is user hostile, and the Code::Blocks install of MinGW broken.
Download your target project using Git.
Open a Windows PowerShell and navigate to the folder where you just put your target project.
Execute the following commands:
cd build
cmake .. -G "MinGW Makefiles"
mingw32-makeThere is no satisfactory android running under Oracle Virtual Box. However, Google supports development environments running under windows.
Trouble is, for android clients, you will want to develop primarily in JavaScript with a bit of Java.
JavaScript delivers the write once, run anywhere, promised by Java, and, unlike Java,delivers distributed computing. This, however, requires the entire java ecology, plus html and css. And I don’t know JavaScript. But more importantly, I don’t know the JavaScript ecology:
The JavaScript ecology is large and getting larger, as parodied by Hackernoon.
For an intro into JavaScript and the accompanying (large) ecology, telling you what small parts of the forest you actually need to get an app up: A study plan to cure JavaScript fatigue.
To set up Git on the cloud, see and to use git on the cloud see.
On my system, I ssh into the remote system «example.com» as the user
git and then in the git home directory:
mkdir MyProject.git
cd MyProject.git
git init --bare
and on my local system I launch the git bash shell, and go to the
MyProject directory. I copy a useful .gitinore and useful
.gitattributes file into that directory, then launch the bash git shell
git init
git add *
git commit -m"this is a project to so and so"
git remote -v
git remote add origin git@«example.com»:~/MyProject
git remote -v
git push -u origin --all # pushes up the repo and its refs for the first time
git push -u origin --tags
Push,of course, requires that I have the ssh keys in putty format where putty can find them, and another copy in openssh format where git can find them. Git expects the ssh keys in .ssh
If you ssh into the other system instead of puttying into it, only need your keys in one place, which is simpler and safer
Invoke ssh-keygen -t ed25519 -C comment under git bash to
automagically set up everything on the client side, then replace their
private key with the putty key using putty key gen’s convert key, and
their public key with the putty key gen copy and paste public key.
Make sure the config file ~/.ssh/config contains
Host «example.com»
    HostName «example.com»
    Port 22
    IdentityFile ~/.ssh/id_ed25519
Host is the petname, and HostName the globally unique name.
An example of the use of petnames is
Host project3
    User git
    HostName github.com
    IdentityFile ~/.ssh/project3-key
Host publicid
    User git
    HostName github.com
    IdentityFile ~/.ssh/publicid-key
Host github.com
    User git
    IdentityFile ~/.ssh/github-key
Putty likes its keys in a different format to git and open ssh, and created pageant and plink so that git and openssh could handle that format, but pageant and plink are broken. Convert format works, tplink hangs. Just make sure that there is one copy as expected by git and openssh, and one copy as expected by Putty.
Save the private key in ssh format with no three letter extension, and the corresponding public key in putty key gen’s copy and paste format with the three letter extension.pub
You need a .gitignore file to stop crap from piling up in the repository, and because not everyone is going to handle eol and locales the same way, you need to have a .gitattributes file, which makes sure that text files that are going to be used in both windows and Linux are eol and utf-8, while text files that will be used only in windows are crlf
At github.com, create a new repository
cd \development\MyProject
git init
git config --global user.name studi-c
git config --global core.editor 'C:/Program Files (x86)/Notepad++/notepad++.exe' -multiInst -notabbar -nosession -noPlugin
git config --global user.email studio@digsig.net
git config --global core.autocrlf false
git remote add origin https://github.com/studi-c/nameofmynewrepository.git
git add --all --dry-run
git add --all
git diff --cache
git commit -m "Initial revision"
git push origin master
After I make a change and test it and it seems to work:
git pull origin masterTest that the application still works after pulling and merging other developers’ changes
git diff .
git add .
git diff --staged HEAD
git commit -m "My change"
git push origin master
For an more complete list of commands, with useful examples.
To make a git repository world readable, you need git daemon running,
but that a half measure, for if you publish your code to the world, you
want the world to contribute, and you will need gitlab to manage that.
A simpler way of making it public is to have the post-update hook turn it into a old plain dumb files, and then put a symlink to your directory in the repository in your apache directories, whereupon the clone command takes as its argument the directory url (with no trailing backslash).
Resolving a merge conflict is usually a little bit messy, creating opportunities to make mistakes
The safest way to resolve a merge conflict is to use git mergetool, followed by git gui.
git gui is useless for resolving merge conflicts, but after having resolved them in your mergetool, then when you click on commit in git gui, you
can see that the situation is what you think it is before issuing the commit command.
In linux, git gui is not necessarily available unless you have installed not just git, but git-all
The best mergetool by far is Meld. But it is preferable to issue the commit command from within git-gui,
since you get a more global view of the situation.
Now integrated into Git, needs no separate install.
When correctly set up, the url for repo foo.git is git://host/foo
git-daemon will listen on port 9418. By default, it will allow access to any directory that looks like a git directory and contains the magic file git-daemon-export-ok.
This is by far the simplest and most direct way of allowing the world to get at your git repository.
Git documentation for Git daemon
When you have submodules, an issue arises with people accessing the submodules through different protocols.
The fix is to make .gitmodules protocol agnostic by using relative urls. As for example
[submodule "libsodium"]
        path = libsodium
        url = ../libsodium.git
        branch = rho-fork
[submodule "mpir"]
        path = mpir
        url = ../mpir.git
        branch = rho-fork
[submodule "wxWidgets"]
        path = wxWidgets
        url = ../wxWidgets.git
        branch = rho-fork
This will enable recursive cloning and all that to work regardless of the root protocol.
After amending the .gitmodules file you need to execute the command git submodule sync,
and now that you are using relative urls, when the base url changes, git submodule sync --recursive
Does much the same thing as git-daemon, makes your repository public with a prettier user interface, and somewhat less efficient protocol.
Gitweb provides a great deal of UI for viewing and interacting with your repository, while git-daemon just allows people to clone it, and then they can look at it.
It seems that the lightweight way for small group cooperation on public projects is Gitolite, git-daemon, and Gitweb.
Gitolite allows you to easily make people identified by their ssh public key and the filename of the file containing their public key write capability to certain branches and not others.
On Debian host apt-get install gitolite3, though someone complains this version is not up to date and you should install from github.
It then requests your public key, and you subsequently administer it through
the cloned repository gitolite-admin on your local machine.
It likes to start with a brand new empty git account, because it is going to manage the authorized-keys file and it is going to construct the git repositories.
Adding existing bare git repositories (and all git repositories it manages have to be bare) is a little bit complex.
So, you give everyone working on the project their set of branches on your repository,and they can do the same on their repositories.
This seems to be a far simpler and more lightweight solution than Phabricator or Gitlab. It also respects Git’s inherently decentralized model. Phabricator and Gitlab provide a great big pile of special purpose collaboration tools, which Gitolite fails to provide, but you have to use those tools and not other tools. Gitolite seems to be overtaking Phabricator. KDE seems to abandoning Phabricator:
The KDE project uses gitolite (in combination with redmine for issue tracking and reviewboard for code review). Apart from the usual access control, the KDE folks are heavy users of the “ad hoc repo creation” features enabled by wildrepos and the accompanying commands. Several of the changes to the “admin defined commands” were also inspired by KDE’s needs. See section 5 and section 6 of the above linked page for details.
So they are using three small tools, gitolite, redmine, and reviewboard, instead of one big monolithic hightly integrated tool. Since we are creating a messaging system where messages can carry money and prove promises and context, the eat-your-own dogfood principle suggests that pull requests and code reviews should come over that messaging system.
Gitolite is designed around giving identified users controlled read and write access, but can provide world read access through gitweb and git-daemon.
Gitea is the fork, and Gogs is abandonware. Installation seems a little scary, but far less scary than Gitlab or Phabricator. Like Gitolite, it expects an empty git user, and, unlike Gitolite, it expects a minimal ssh setup. If you have several users with several existing keys, pain awaits.
It expects to run on lemp. Install Lemp stack on Debian
It’s default identity model is username/password/email, but it supports the username/ssh/gpg user identity model. The user can, and should, enter an ssh and gpg key under profile and settings / ssh gpg keys, and to prevent the use of https/certificate authority as a backdoor, require commits to be gpg signed by people listed as collaborators.
Git now supports signing commits with ssh keys, so probably we should go on the ssh model, rather than the gpg model, but I have not yet deleted the great pile of stuff concerning gpg because I have not yet moved to ssh signing, and do not yet know what awaits if we base Gitea identity on ssh keys.
It can be set to require everything to be ssh signed, thus moving our identity model from username/password to ssh key. Zooko minus names instead of minus keys
If email is enabled, password reset is by default enabled. Unfortunately email password reset makes CA system the root of identity so we have to disable it. We need to make gpg the root of identity, as a temporary measure until our own, better, identity system is working.
It is development model is that anyone can fork a repository, then submit a pull request, which request is then handled by someone with authority to push to that repository.
gpg signatures should, of course, have a completely fake email address, because the email address advertised in the gpg certificate will be spammed and spearphished, rendering it useless. But gpg is completely designed around being used with real email addresses. If you are using it to sign, encrypt, and verify emails through its nice integration with the thunderbird mail client, you have to use real email addresses.
Uploading a repository to Gitea is problematic, because it only accepts
repositories on other Gitea, Gog, Gitlab, and Github instances. So you have
to create a fresh empty repository on Gitea, set it to accept an ssh key
from your .ssh/config, and merge your existing repository into it.
Download the empty gitea repository. Make it even emptier than it already
is with git rm. Because the histories are unrelated, almost anything with
the same name will cause a merge conflict.
git rm *
git commit -am "preparing to merge into empty repository"
git push
Got to the real repository, and merge the empty gitea repository on top of it:
git pull myemptygitearepository  --allow-unrelated-histories
# The histories are no longer unrelated, so push will work.
We are doing this in the real repository, so that the original history remains unchanged - we want the new empty gitea repository on top, not underneath.
Comes with password based membership utilities and web UI ready to roll, unlike Gitolite which for all its power just declares all the key management stuff that it is so deeply involved in out of scope with the result that everyone rolls their own solution ad-hoc.
These involve fewer hosting headaches than the great weighty offerings of GitLab and Phabricator. They can run on a raspberry pi, and are great ads for the capability of the Go language.
Gitea, like Gitolite, likes to manage people’s ssh keys. You have to upload your ssh and gpg public key as part of profile settings. Everything else, is unfortunately, password based and email based, which is to say based on the domain system and certificate authority system, which is an inherent massive security hole, since the authorities can seize the website and put anything on it they want. Therefore, need to use the Gitea signing feature
This seems to require Gitea to do a lot of signing, which is a gaping security hole, though it can be used with the gpg feature allowing short lived subkeys.
Will sign with subkey, because MasterKey should not be available on the server
Too fat, and not exactly open source.
Server Size : 2GB Ram – 1 CPU Core – 50GB SSD If you have more than five users, this may not suffice, but you can limp along OK with one gigabyte.
Installation and configuration of Phabricator (which is also likely to be useful in installing PhpAdmin, because it covers configuring your “MySQL” (Actually MariaDB) database.
Configuring Phabricator requires a whole lot of configuration of ssh and git, so that ssh and git will work with it.
Phabricator notifications require node.js, will not run with apache. Ugh. But on the other hand, Comen needs node.js regardless. But wordpress requires PHP, not sure that is going to play nice with node.js. Node.js does not play well with apache PHP, and Phabricator seems to use both of them, but likely only uses node.js for notifications, which can wait. Usual gimmick is that to use Apache’s ProxyPass directive to pass stuff to node.js. Running both node.js and apache/PHP is likely to need a bigger server. Apache 2.4.6 has support for proxying websockets mod_proxy_wstunnel
The Phabricator website suggests nginx + php-fpm + “MySQL” (MariaDB) + PHP. Probably this will suffice for Wordpress. nginx is the highest performance web server, but it is not node.js
Apache, node.js, and nginx can all coexist, by routing stuff to each other (usually with the highest performing one, nginx, on top) but you will need a bigger server that way
Blender is a huge open source success, breaking into the big time, being free and open tool for threedee drawing. It’s development platform is of course self hosted, but not on Gitlab, on Phabricator. Maybe they know what they are doing.
Phabricator is a development environment provided by Phacility. It is written in in PHP, in a phabricator development environment, which is designed to support very large development communities and giant corporations. It is written in PHP, which makes me instantly suspicious. But it is free, and, unlike GitLab, genuinely open source.
Being written in PHP, assumes a Lamp stack, apache2, php 5.2 or later, mysql 5.5 or later
Phabricator assumes and enforces a single truth, it throws away a lot of the inherent decentralization of git. You always need to have one copy of the database, which is the King – which people spontaneously do with git, but with git it is spontaneous, and subject to change.
KDE seems to be moving away from Phabricator to Gitolite, but they have an enormously complex system, written in house, for managing access, of which Gitolite is part. Perhaps, Phabricator, being too big, and doing too much was inflexible and got in their way.
Github clients spontaneously choose one git repository as the single truth, but then you have the problem thatGithub itself is likely to be hostile. An easy solution is to have the Github respository a clone of the remote repository, without write privileges.
Enemy controlled.
Git, like email, automatically works – provided that all users have ssh login to the git user, but it is rather bare bones, better to fork out the extra cash and support gitlab – but gitlab is far from automagic, and expects one git address for git and one chat address for matterhorn, and I assume expects an MX record also.
Gitlab is a gigantic memory hog, and needs absolute minimum of one core and four gig, and two cores and eight gig strongly recommended for anything except testing it out and toying with it. It will absolutely crash and burn on less than four gig. If you are running gitlab, no cost advantage to running it on debian. But for my own private vpn, huge cost advantage.
Gitlab absolutely requires postgreSQL. They make a half assed effort to stay MySQL compliant, but fall short. Not a big disk space hog – ten gigabytes spare will do, so fine on thirty two gigabyte system.
Gitlab Omnibus edition contains the postfix server, thus can send and receive email to is host address
Setup Gitlab with Protected branch flow
With the protected branch flow everybody works within the same GitLab project. The project maintainers get Maintainer access and the regular developers get Developer access. The maintainers mark the authoritative branches as ’Protected’. The developers push feature branches to the project and create merge requests to have their feature branches reviewed and merged into one of the protected branches. By default, only users with Maintainer access can merge changes into a protected branch. Each new project requires non trivial manual setup.
But, seems likely to be easier just to use the main gitlab site, as least until my project is far enough advanced that the evil of github is likely a threat.
Gitlab is intended to be hosted on your own system, but to learn how to use it in a correctly configured gitlab environment, and to learn what a correctly configured gitlab environment looks like and how it is used, going to need an account on gitlab.
Gitlab requires that the Openssh port 22, the http port 80, and the https port 443 be forwarded. Http should always get automatic redirect to hppts governed by a lets encrypt certificate.
GitLab Mattermost expects to run on its own virtual host. In your DNS you would then have two entries pointing to the same machine, e.g. gitlab.«example.com» and mattermost.«example.com». GitLab Mattermost is disabled by default, to enable it just put the external url in the configuration file.
Github, on the other hand, allows you to point your own domain name to your custom (static) github website and git repository as if on your own system.
I am suspicious of placing your own website on someone else’s system, especially a system owned by social justice warriors, and the restriction to static web pages is likely intended to facilitate political censorship and law enforcement, and physical attacks on dissidents by nominally private but state department supported thugs and Soros supported thugs.
Omnibus edition of gitlab, usually available already configured to a cloud provider.
Instructions for installing it yourself.
It is like advisable to setup apache, the apache virtual hosts, and the apache certificates first.
Gitlab markdown, like Github markdown, can mostly succeed in handling html tags.
We are not going to build on the cloud, but we will have source code,
chat, and code of conduct on the cloud, probably on git.cpal.cw and
chat.cpal.cw
Configuring gitlab is non trival. You want anyone to be able to branch, and anyone to be able to issue a pull request, but you only want authorized users to be able to merge into the master.
Since we want to be open to the world, implement recaptcha for signups, but allow anyone in the world to pull without signing up. To create a branch, they have to sign up. Having created a branch, they can issue a pull request for an authorized user to pull their branch into the master, they have to sign up.
Gitlab workflow is that you have a master branch with protected access, a stable branch with protected access, and an issue tracker.
You create the issue before you push the branch containing fixes for the issue. There must be at most one branch for every issue.
Developers create a branch for any issues they are trying to fix, and their final commit should say something like “fixes #14” or “closes #67.” and then, when the branch is merged into the master, the issue will be marked fixed or closed.
Digital Ocean offers a free entry, and a quite cheap system
But virmach, even cheaper.
Eight gig, two cores, which you will need to run gitlab for everyone, is Debian 9 enterprise edition on virmacht.com $40 per month.
Also, vpn on the cloud.
Currency project should be hosted on digital ocean at git.«example.com», at $20 per month (Four gig, two cores), using Gitlab free omnibus edition. They suggest configuring your own Postfix email server on the machine also, but should this not be automatic? Probably already in the DigitalOcean Gitlab droplet.
How to us the gitlab one click install image to manage git repositories.
You will need to get your SSL certificate from cyberultra and supply it to Gitlab (though gitlab has built in lets-encrypt automation, so maybe not).
Subdomains are a nameserver responsibility, so you really have to point your domain name nameservers to cyberultra, or else move everything to digital ocean.
All digital ocean ips, except floating ips, are static. You will need an A record and an AAAA record, the AAAA record for IP6
Gitlab did not want to support fully browsable public repositories, but they have been supported since 6.2
Gitlab omnibus edition comes integrated with Mattermost, but mattermost is turned off by default.
Before spending money and going public, you might want to install locally and run on your local system. Enable mattermost.
Since gitlab will have the root web page on git.jim.com, you will need
another DNS entry pointing at the same host, something like
chat.jim.com. So, though both on the same machine, one is the root
http page when accessed by one domain name, the other the root entry
when accessed by another domain
name.
To couple to the desktop requires a pile of information and configuration, which most people ignore most of the time. To the extent that they provide it, they seem to write it for the Gnome based desktops, Cinnamon and Mate – more for Mate because it is older and has changed less.
An install program should use desktop-file-install which is presumably
customized for each desktop,
The autostart directory `$XDG_CONFIG_HOME /autostart’ is a part of the freedesktop.org/XDG Desktop Application Autostart Specification.
$XDG_CONFIG_HOME is seldom set, in which case it is equal to ~/.config, hence the autostart directory is nearly always ~/.config/autostart
The desktop specification is chock full of references to $XDG_foo_bar,
which is confusing because these are environment variables that no one
ever sets, and which should never be set, which means that their default
values almost always apply. Further, many of the directories are not
default created, so the first program to write a file into them has to create them. Which is likely to be your program, because superuser is likely to
create a user specially for your program.
This mysterious usage is explained, cryptically, in base directory specifications
Since wxWidgets is written for GDT in its linux version, it is written for Gnome.
Gnome3, the default Debian desktop, is broken, largely because they refuse to acknowledge that it is broken, so the most standard linux environment, the one for which your practices are least likely to break on other linuxes, is Debian with Lightdm and Mate. (pronounced Mahtee)
Looks to me that KDE may be on the way out, hard to tell, Gnome3 is definitely on the way out, and every other desktop other than Cinnamon and Mate is rather idiosyncratic and non standard.
Lightdm-Mate has automatic login in a rather obscure and random spot. Linux has its command line features polished and stable, but is still wandering around somewhat lost figuring out how desktops should work.
Under Mate and KDE Plasma, bitcoin implements run-on-login by generating a
bitcoin.desktop file and writing it into ~/.config/autostart ($XDG_CONFIG_HOME/autostart).
It does not, however, place the bitcoin.desktop file in any of the
expected other places. Should be in /usr/share/applications ($XDG_DATA_DIRS/applications).
The following works
$ cat ~/.local/share/applications/bitcoin.desktop
[Desktop Entry]
Type=Application
Name=Bitcoin
Exec=/home/«username»/bitcoin-22.0/bin/bitcoin-qt -min -chain=main
GenericName=Bitcoin core peer
Comment=Bitcoin core peer.
Icon=/home/«username»/bitcoin-22.0/bin/bitcoin-qt
Categories=Office;Finance
Terminal=false
Keywords=bitcoin;crypto;blockchain;qwe;asd;
Hidden=false

cat ~/.config/autostart/bitcoin.desktop
[Desktop Entry]
Type=Application
Name=Bitcoin
Exec=/home/«username»/bitcoin-22.0/bin/bitcoin-qt -min -chain=main
Terminal=false
Hidden=false
Under Mate and KDE Plasma, bitcoin stores its configuration data in
~/.config/Bitcoin/Bitcoin-Qt.conf, rather than in ~/.bitcoin
wxWidgets attempts to store its configuration data in an environment appropriate location under an environment appropriate filename.
It does not, however, seem to have anything to handle or generate desktop files.
desktop files are the Linux desktop standard for a gui program to integrate itself into the linux desktop, used to ensure your program appears in the main application menu, the linux equivalent of the windows startup menu.
Getting your desktop file into the menus is slightly different in KDE to the way it is in Gnome, but there are substantial similarities. FreeDesktop tries to maintain and promote uniformity. Gnome3 rather casually changed the mechanism in a minor release, breaking all previous desktop applications.
Every Linux desktop is different, and programs written for one desktop have a tendency to die, mess up, or crash the desktop when running on another Linux desktop.
Flatpack is a sandboxing environment designed to make every desktop look to the program like the program’s native desktop (which for wxWidgets is Gnome), and every program look to the desktop like a program written for that particular desktop.
Flatpack simulates Gnome or KDE desktops to the program, and then translates Gnome or KDE behaviour to whatever the actual desktop expects. To do this, it requires some additional KDE configuration for Gnome desktop programs, and some additional Gnome information for KDE desktop programs, and some additional information to cover the other 101 desktops.
WxWidgets tries to make all desktops look alike to the programmer, and Flatpack tries to make all desktops look alike to the program, but they cover different aspects of program and desktop behaviour, so are both needed. Flatpack covers interaction with launcher, the iconization, the install procedure, and stuff, which wxWidgets does not cover.
Linux installs tend to be wildly idiosyncratic, and the installed program winds up never being integrated with the desktop, and never updated.
Flatpack provides package management and automatic updates, all the way from the git repository to the end user’s desktop, which wxWidgets cannot.
This is vital, since we want every wallet to talk the same language as every other wallet.
Flatpack also makes all IPC look alike, so you can have your desktop program talk to a service, and it will be talking gnome iPC on every linux.
Unfortunately Flatpack does all this by running programs inside a virtual machine with a virtual file system, which denies the program access to the real machine, and denies the real machine access to the program’s environment. So the end user cannot easily do stuff like edit the program’s config file, or copy bitcoin’s wallet file or list of blocks.
A program written for the real machine, but actually running in the emulated flatpack environment, is going to not have the same behaviours. The programmer has total control over the environment in which his program runs – which means that the end user does not.
Documenting this here because all the repository based methods of installing tor that are everywhere documented don’t work and are apt to screw up your system.
This is needed by programs that use tor, such as cln (core lightning) but not needed by the tor browser
install tor
systemctl enable --now tor
nano /etc/tor/torrc:
In ’etc/tor/torrc`uncomment or add
ExitPolicy reject *:* # no exits allowed

ControlPort 9051
CookieAuthentication 1
CookieAuthFile /var/lib/tor/control_auth_cookie
CookieAuthFileGroupReadable 1

DirPort 0
ORPort 0
ControlPort should be closed, so that only applications running on your computer can get to it.
DirPort and ORPort, if set, should be open – whereupon you are running as a bridge. Which you probably do not want, but are good for obfuscation traffic.
Because the cookie file is group readable, applications running on your computer can read it to control tor through the control port. It is a good idea to firewall this port so that it is externally closed, so that nothing outside the computer can control tor.
DirPort and ORPort tell tor to advertise that these ports are open. Don’t open or advertise them (set to zero), because then you are running as a bridge.
If you want to run as a bridge to create obfuscation:
DirPort «your external ip address»:9030
ORPort «your external ip address»:9001Torproject on Github provides information that actually works.
Download the tar file to your home directory, extract it, and execute the command as an ordinary user, no sudo, no root, no mucking around with `apt``
tar -xf tor-browser-linux-x86_64-13.0.8.tar.xz
cd tor-browser
./start-tor-browser.desktop --register-app
The next time you do a graphical login, tor will just be there and will just work, with no fuss or drama. And it will itself check for updates and nag you for them when needed.
A video server considerably more freedom oriented than Jitsi
Namecoin plus bittorrent based websites. Allows dynamic content.
Not compatible with wordpress or phabricator. Have to write your own dynamic site in python and coffescript.
Messaging system, email replacement, with proof of work and hidden servers.
Non instant text messages. Everyone receives all messages in a stream, but only the intended recipients can read them, making tracing impossible, hence no need to hide one’s IP. Proof of work requires a lot of work, to prevent streams from being spammed.
Not much work has been done on this project recently, though development and maintenance continues in a desultory fashion.
See libraries
This is most useful when you have a lot of real and virtual machines on your local network
sudo apt update && sudo apt upgrade -qy
sudo apt install -qy nfs-kernel-server nfs-common.
sudo nano /etc/default/nfs-common
In the configuration file nfs-common change the paramter NEED_STATD to no and NEED_IDMAPD to yes. The NFSv4 required NEED_IDMAPD that will be used as the ID mapping daemon and provides functionality between the server and client.
NEED_STATD="no"
NEED_IDMAPD="yes"
Then to disable nfs3 sudo nano /etc/default/nfs-kernel-server
RPCNFSDOPTS="-N 2 -N 3"
RPCMOUNTDOPTS="--manage-gids -N 2 -N 3"
then to export the root of your nfs file system: sudo nano /etc/exports
/nfs 192.168.1.0/24(rw,async,fsid=0,crossmnt,no_subtree_check,no_root_squash)sudo systemctl restart nfs-server
sudo showmount -esudo apt update && sudo apt upgrade -qy
sudo apt install -qy nfs-common
sudo mkdir «mydirectory»
sudo nano /etc/fstab# <file system> <mount point> <type> <options> <dump> <pass>
«mynfsserver».local:/ «mydirectory» nfs4 _netdev 0 0Where the «funny brackets», as always, indicate mutas mutandis.
sudo systemctl daemon-reload
sudo mount -a
sudo df -h
«example.com» gpg key 154588427F2709CD9D7146B01C99BB982002C39F
This work is licensed under the Creative Commons Attribution 4.0 International License.